Sunday, November 30, 2014

Skegs finally finished and installed

With one thing and another, I've been working on finishing these skegs for far longer than I thought it would take.  In the previous post I covered how I shaped the skegs from two layers of 3/4" plywood.  The next step was to sheath them with fiberglass cloth.  

To make best use of the cloth I cut strips off the width of the 50" cloth.  It took two pieces per side, for a total of 8 pieces, which overlap on what will be the bottom edge.  

Because of the finger hold cutouts I didn't feel I could apply one piece from one side around the edge and down the other.  So applying one piece at a time on each side, I had at least four separate sessions to apply all the cloth.

Getting the cloth to conform to the fingerholds took a lot of prodding with the epoxy brush to keep the glass from pulling up and allowing air bubbles underneath.  That went on for an hour or so after laying the cloth until the epoxy started to cure.  


Before applying the glass I had rounded over the edges of the finger holds with sandpaper, except for one that I either forgot to do, or didn't round enough.  I could not get the cloth to stay down, so I put on a layer of release fabric and clamped a dowel of the right size in place.


That worked pretty well, though the dowel was a bit of trouble to break loose.  I could have just put packing tape over the dowel and skipped the release fabric, but I wanted to try out the fabric.

After I got all the fiberglass applied, I had multiple sessions of applying fairing compound, sanding it smooth, and iterating on the low spots.  While I had the fairing mix made, I took the opportunity to do a little more work on the rudder and centerboard, which I had set aside short of completion some time ago.


I'm going to put UHMW plastic on the edges of the skegs, so I ripped about 1/4" off my 1 1/2" wide stock, rounded the ends, and routed the edges.  I'm going to countersink stainless screws into this to hold it on.


To keep water from following the screws and getting under the fiberglass, I drilled oversize holes to fill with epoxy.  I'll then drill pilot holds into the epoxy plugs to drive the screws in there.


Here's a shot of my old Delta drill press, which has a swivel head.  I think this is the only time I've ever swiveled it...


Here I've filled the holes with epoxy thickened with wood flour.


And here's the result after removing the excess. 


To locate the skegs on the boat and ensure they are parallel and equally spaced from center, I taped down a reference line and measured out from that. 


I applied thickened epoxy, and braced the skegs from the ceiling.  Not much pressure was needed.  

I didn't find a specific measurement for how wide to space the skegs, so I guessed at a spacing that looked right to me.  I wanted to leave enough space next to the centerboard slot to allow for the fillet, the tape to adhere the centerboard slot gasket, and room for the gasket to flex.


After the epoxy cured, I ran a fillet around the edges.
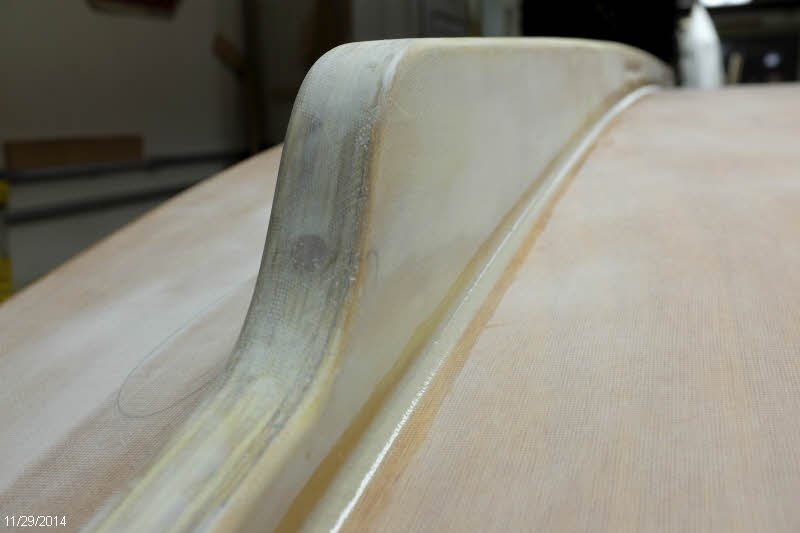

Heres' an overall view.  Looking good!


I finished off the fillets by sanding them a bit with a small dowel wrapped in sandpaper.  It didn't take long and they smoothed out very nicely.  These are now some of the nicest fillets no one will ever see...


Now I will give the final sanding to the hull panels, and it will be time to slap on some paint!

Thursday, October 30, 2014

Shaping skegs using router and template

With the skegs rough cut and laminated, the next step was to bring them down to final dimension.  Keeping the curves fair and the right shape to fit the hull, and keeping both skegs identical was a daunting prospect.  

However, I realized that I could use the pattern I cut to trace out the parts as a router template to trim the skegs to final shape.  The first step was to screw the pattern to the rough-shaped part.


I then used a pattern bit with a bottom bearing in the router table to trim the stock to the final dimension.  As you can see, the bit is not long enough to to the entire side, and there is also a little lip on the bottom between the bearing and the bit.  This won't be a problem.


Here's a shot of the nice curve towards the stern. 


Once I went all the way around, I removed the template, and switched to a pattern bit with a top bearing. The bearing now bears against the part of the skeg that's already routed to final dimension, and brings the remainder of the edge into line.  I flipped the stock over to get both edges finished.


The masonite I used for a pattern was a little bit too short, so I now drew in the curve at the stern and cut that out with a jigsaw.


And shaped it to final dimension with my Shinto rasp. 


Looking good.  The fit to the hull is as good as you make the pattern.  In my case, I'll have to do just a bit of minor fitting before I'm satisfied.


Next I routed the finger grips in the sides of the skegs with a bit that looks like this.  This is 3/8" radius, and I cut about 1/4" deep.


The grooves look like this.  The gentle curve of the skeg was easy to run against the fence for consistent spacing.


I followed up with a 1/4" roundover bit on the edges so that my fiberglass cloth will lay over there nicely, and hand sanded the edges of the finger grooves to get rid of the sharp edge.


Next I put tape over the bottom of the holes where there were voids in the plywood, and poured in unthickened epoxy to fill those spaces.  


After that cures I will do a little fairing work to fill the slight depressions that are left, some edges that chipped out a bit, and any other irregularities.  Then I will fiberglass these parts.


Sunday, October 26, 2014

Skegs under construction

Pretty much the last bits of boat to build and install are the two skegs on the bottom of the hull. These provide a stable base for the boat while on the trailer or beach and also are handy handholds to right the boat if capsized.

I looked through my bits of wood laying around and didn't find any solid stock that was inspiring, so I decided to build these from standard ACX plywood.  Two thicknesses of 3/4" ply is the right thickness, and as these will be completely fiberglassed  I think they will hold up just fine. And if not, I can always replace them with something else.

Working with the sheet plywood means that I won't have to splice parts together, and it should be easier to build parts that are straight.  Any voids I find I plan to fill with epoxy.

The first step in the process was a trip to the local newspaper, where I bought an end-roll of newsprint.  I unrolled a length and layed out the pattern for the skeg based on dimensions in the plan addendum.

I then perforated the pattern with an ice pick and mallet to transfer the curves to a piece of masonite, which I then cut out with a jigsaw.


I faired the curves with block plane and sandpaper and the result is shown here on the hull:


With the pattern made, I could trace out the four pieces I needed to cut.  Another alternative would have been to cut out and finish one piece, and then trace from that.


I used a jigsaw to cut the four pieces to rough shape,


And laminated the two pairs.


I was careful to ensure the glueup was straight.  In the foreground you can see a tall bar clamp applying a bit of down pressure, in the middle a stack of plywood cutoffs supports the center, and in the background the tips are under a ladder step to bend them down a touch.  I used a 4-foot level as a 'straight' reference before all the clamps were in the way.


Here are the rough glued up parts in approximate location on the hull.  I'll next bring the edges down to final dimension, fill a couple voids in the ply with epoxy, rout finger grips in the sides, and round over the edges that are not in contact with the hull. 


I'm thinking I will fiberglass these off the boat, since it will be easier to work on them.  When they are finished I'd then install them with epoxy and fillet them generously to the hull.  I'm thinking right now that I do not need to apply fiberglass tape to those fillets, and that will save time finishing that area.

Hull fairing and final epoxy coat

Upon my return from Sail Oklahoma, I continued work on the hull bottom.  In places where the fiberglass overlapped I needed to apply fairing compound and sand it back to make the transition gradual.

At the bow, the cloth on the garboard planks overlaps the bow transom, and the cloth on the tramsom overlaps the other way, and onto planks 2 and 3, which have no cloth.


The seam in the cloth falls across the garboard plank in front of the centerboard slot,


And at the stern transom cloth laps both ways, plus an extra thickness where the seam between the two pieces of cloth on the bottom meet.


The fairing mixture I used was epoxy thickened with micro-balloons (tiny glass spheres that sand easily.  I applied it to all the places shown above and sanded it back.  There were still a couple low spots (more easily detected with the hand than the eye), so I applied more to those areas and sanded again.  

I eventually got to a point where I decided it was good enough', and then applied a final coat of epoxy.  I did that because I felt there were some tiny spots in the weave of the glass cloth that were not fully filled, and on planks 2 and 3 there were a couple areas where I had accidentally sanded down to or close to bare wood.

The real test of how well I did on the fairing will be when the paint is on and the boat is out in the sun catching reflections from everything around.  But the shiny fresh epoxy gives a preview and confirms that it's good enough for me.


Sail Oklahoma report

A couple weeks ago my build progress got interrupted for a week as I traveled with my wife to the Sail Oklahoma 2014 small boat gathering.  We had a great time meeting new people and looking at a wide variety of home-built boats - everything from skin-on-frame paddle craft to large multihull boats.  

There were classes on various subjects and talks by boat designers from across the globe - U.S., Canada, Britain, Australia and New Zealand.  And the weather was poor enough at times with the remains of a hurricane wetting down the site that cramming into shelter and listening was a perfect use of the time.

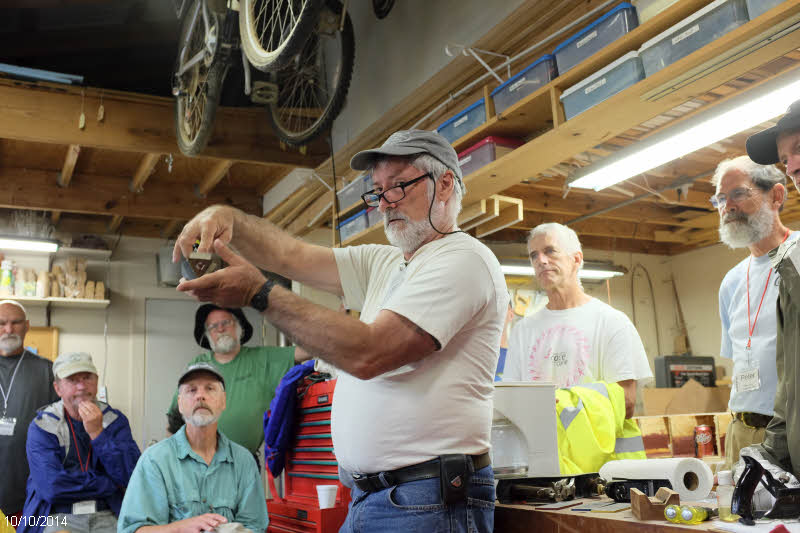
I was particularly pleased to meet and talk with John Welsford, the designer of the SCAMP sailboat.  Here's John teaching one of his classes - this one was on sharpening tools.


There were three SCAMPs there on the water, and the Monies' Red Scamp, which was on display in the yard. 

Here's Paul Breeding's "Forever Young", attending from Colorado.  This is the SCAMP that got me inspired to build my boat when I saw it at the Lake Pepin Messabout 18 months ago, and Paul was nice enough to take me out in her:


Here's Phil McGowan's Scamp, down from Idado, which I was also able to sail in:


And from Florida, here's Kenjamin's experimental take on the design, with his wishbone mast in evidence. 


There were also other Welsford designs attending - here's a Tread Lightly from Kansas:


And a real nice Houdini from Tennessee:


A Navigator from the local area, 


And a John Fisher's Sweet Pea, also from Colorado.  We had a nice sail on her.  She's a much bigger boat than the Scamp, and has been on the TX200:


Probably the single design with the best representation were the Puddle Duck racers.  PDRs are boxy 4 foot wide 8 foot long sailboats.  The hull form is specified, but above that anything goes.  Here's a cool artistic take on the design - the Chevy Duck, with working lights:
  

Those duckers have a lot of fun - here's a shot of them out on the course rounding the first buoy in their class race.  Of course the buoy is - an inflatable duck!


These are simple boats that are a lot of fun - I may have to put one of these together after my Scamp is done...

Thursday, October 2, 2014

Fiberglassing the hull

With the hull bottom filled, sanded, and edges rounded over I could proceed to apply fiberglass.  I purchased 50" wide fiberglass, which I believe is the widest that is generally available.  Even so, this width is not wide enough to cover the hull bottom and both garboard panels, so a seam is needed.

I determined that I could lay the cloth on the hull so the seam would run through the middle of the centerboard slot, reducing the amount of overlap that needs to be faired and smoothed over.  I covered the remainder of the hull with a leftover piece of a narrower width left over from a previous kayak project.


After trimming the edges I started saturating the fiberglass.  Rather than using a squeegee this time, I used a roller to apply the epoxy.  This worked well, was very controllable, but was somewhat slow.


Job done.  Here you can see the overlap seam aft of the centerboard slot.  As it turns out, this will be near the skeg that is installed later, so any unevenness in the seam will be fairly unobtrusive.  Another reason to run the seam here vs. down the center of the hull bottom.


Here's where I ran the seam in front of the centerboard, minimizing the amound of fairing I will need to do.


I also applied cloth to the bow and stern transoms, and overlapped that onto the hull panels. This was a little fussy, as I had to cut away around the hull strake laps.


And here's a shot with the first coat of thickened epoxy on the cloth, and the 2nd coat of epoxy on hull panels 2 and 3.


After I finish filling the weave of the fiberglass, the skegs get installed, and then paint.