Saturday, June 28, 2014

Cockpit sole installed!

With the little hatch locating triangles installed on the bottom of the cockpit sole, it was time to give that surface a final coat of epoxy in preparation for installation.


I had trial fit the sole multiple times to ensure the process would go smoothly when all the cleats were covered with thickened epoxy.  This also allowed me to see where there were any gaps that would need clamping.

I mixed up a couple batches of thickened epoxy and applied it to the cleats, then with two helpers dropped the sole into place.  I then used some sticks and clamps to push down in a few places, and spent some time scraping off excess epoxy from the hold.  The floor hatches gave good access for this, and allowed me to confirm I had good contact.


This was a big step to get done, one that I had been dreading for some time.

Hatch hold-downs

I'm building eight plywood hatches into my boat.  One issue with hatches is how to latch them, with maybe the simplest answer being to put six or so turnbuckles around the perimeter.  I thought it would be more elegant if I could reduce that number to maybe two.  In order to attempt that, I've built in interior hold-downs for one side of the hatch.  This is an idea borrowed from another SCAMP builder.

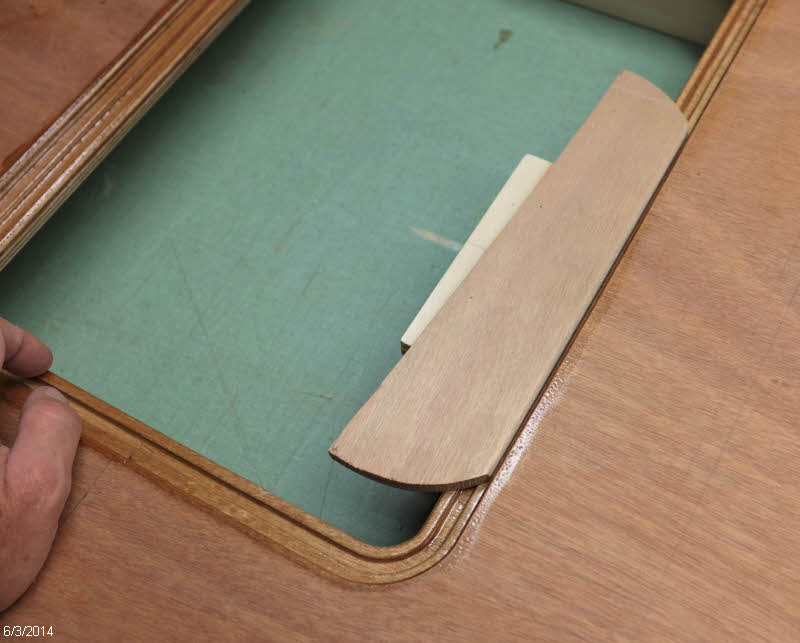
Here's the proto-type.  From the top down, there is hatch cover, hatch stiffener, and then the latch made of three layers of 9mm ply.  Notice that the latch part extends out beyond the edge of the hatch, and this is key.  It gives you room to insert the hatch into the hold, and snugs down the hatch cover on the gasket as the hatch closes.


Here's the prototype being checked for fit


I laminated a bunch of stock and cut it to length.  The two longer pieces are for the seat hatches. The V-cuts are there to locate the hatch in the center of the hole on the latch side and the two adjacent sides.  I cut them to rough dimension with the bandsaw, and then made a little router jig to make sure they are all the same.


I then made a positioning jig to locate the latches side to side and at the proper distance from the edge.


After applying thickened epoxy, I held the latch in place and shot two 23-gauge pins in from the other side to hold it in place ...


... while I removed the positioning jig and applied a couple clamps.  I really like the stainlesss pins in an application like this because they keep the parts from sliding around while putting the clamps on.


Here's the set of them all glued up. 


Next I laminated some stock from which to cut the little triangle pieces.  I inserted each hatch into it's proper hole and shimmed them in  the center.  Then applied thickened epoxy to the triangles and shot them with three pins each to locate and clamp them.  No additional clamping needed for those.  I then removed the hatch covers and cleaned up the epoxy squeeze-out. 


Getting these little triangles installed under the cockpit sole was the piece of work that has been holding me up from getting the cockpit sole glued down. See next post...

Rudder head construction

Here's the construction sequence for the rudder head.  I had a couple goals I was trying to meet.  I wanted to line the uphaul/downhaul line channels with copper pipe to reduce friction, and wanted to laminate the center section first to make it easy to clean up and finish areas that will be hard to get at later when fully assembled

I fussed around with the layout for the line channels for a while before deciding on the route shown below.  I wanted the openings to exit the front of the rudder head as near the tiller as possible, and I wanted the rear exit to be gentle, so the line would not need to take a right-angle turn there.  Using the flexible copper pipe, here's what I decided on.


Heres' the exit on the front of the rudder head


And here's the back side.  Because of the thickness of my rudder, I added one layer of 4mm ply in the center of the lamination.


 Here's the glue-up of just the center layers of the rudder head


After the epoxy cured it was time to clean up the edges and trim the tubes to length.


A small hacksaw made quick work of the protruding tubes


And a bit of sanding smooths them down nicely.  I will further round the edges before running the uphaul/downhaul lines over them.


I used epoxy/graphite mixture to match what I did on the cheek pieces


And then laminated the complete assembly.