Showing posts with label pin nailer. Show all posts

Saturday, August 16, 2014

Custom chart racks designed, built, and installed

SCAMP has a ton of storage in front of bulkhead 3, though I expect it will be best for lightweight items like sleeping bags, pillows, clothing.  And if out on a multi-day trip, it would be good to have some reading material along.  Rather than let maps, books, and magazines fall to the floor I thought it would be good to have some dedicated storage for those items.  Inspired by builder Dan from British Columbia, I decided to build some racks.

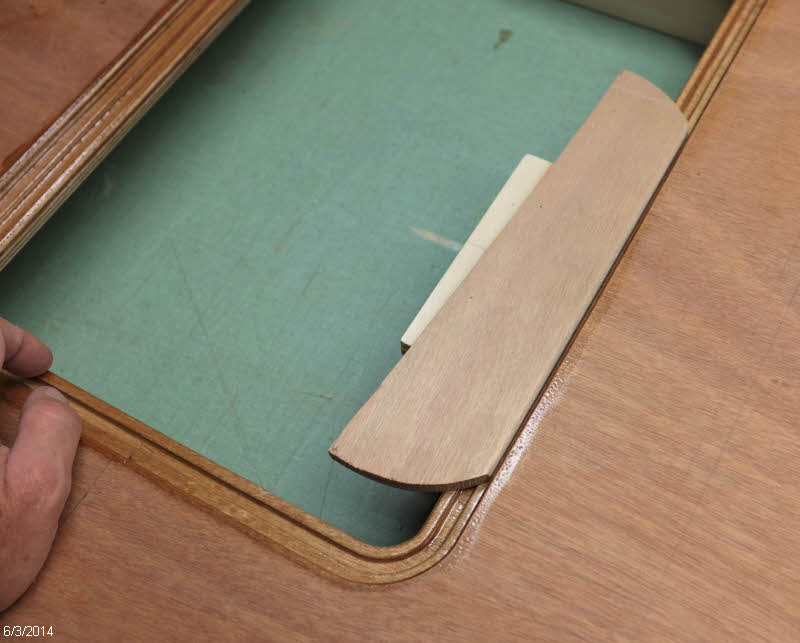
I started out with a cardboard prototype that I modified a number of times.  It was very difficult to get all the angles to look right and fit the hull.  I eventually decided on something like this.


I then built the prototype again, this time in some light plywood from some old panelling.  The cardboard flexes and lets you cheat a little with the fit, so using more rigid material let me finalize the angles and fit of the pieces.  Masking tape works fine to hold the pieces together.


Once I had all the pieces fitting right, I disassembled the shelf and transferred the dimensions to extra ply from the boat.  The bottom of the shelf is 9mm, and the sides and front are of 6mm.  

One of the benefits of making a good pattern was that I could reverse all the pieces and make a mirror image, so I did that and made a chart rack for both port and starboard. 

I taped the parts together again.


And ran a fillet of epoxy on the inside.  I didn't make any effort to glue the pieces together except for the fillet, and that works fine.


Next I taped on the front pieces.


And filleted them in place.  After the epoxy cured I used the 12" disk sander to sand all the overhangs flush.


Here's a shot of the progression from cardboard prototype to finished item.


The angles look a little funny here, but they all make sense in the boat.  Nothing is square on these, and all the compound angles made this a challenging little project.  I spent more time designing and building this than I care to admit, but I'm happy with the result.


I decided to let the wood shine through on these parts, and applied 2 coats of epoxy to finish them off.  No need for varnish or anything to protect from UV as they will be in an enclosed area of the boat.


I lined up the shelves and marked their position, then fired two pin nails from the inside of the boat through the hull to mark where the bottom of the shelf was.  I then buttered up the edges of the shelf with thickened epoxy and held it in place while my wife helped out by firing two pins from the hull exterior into the bottom of the shelf to hold it in place.  One strip of tape held the top of the shelf against the hull. 


I then filleted around the shelf/hull joints to finish things off.  I'll touch up the paint that I had to scrape off to mount these and the installation will be complete. 


Saturday, June 28, 2014

Hatch hold-downs

I'm building eight plywood hatches into my boat.  One issue with hatches is how to latch them, with maybe the simplest answer being to put six or so turnbuckles around the perimeter.  I thought it would be more elegant if I could reduce that number to maybe two.  In order to attempt that, I've built in interior hold-downs for one side of the hatch.  This is an idea borrowed from another SCAMP builder.

Here's the proto-type.  From the top down, there is hatch cover, hatch stiffener, and then the latch made of three layers of 9mm ply.  Notice that the latch part extends out beyond the edge of the hatch, and this is key.  It gives you room to insert the hatch into the hold, and snugs down the hatch cover on the gasket as the hatch closes.


Here's the prototype being checked for fit


I laminated a bunch of stock and cut it to length.  The two longer pieces are for the seat hatches. The V-cuts are there to locate the hatch in the center of the hole on the latch side and the two adjacent sides.  I cut them to rough dimension with the bandsaw, and then made a little router jig to make sure they are all the same.


I then made a positioning jig to locate the latches side to side and at the proper distance from the edge.


After applying thickened epoxy, I held the latch in place and shot two 23-gauge pins in from the other side to hold it in place ...


... while I removed the positioning jig and applied a couple clamps.  I really like the stainlesss pins in an application like this because they keep the parts from sliding around while putting the clamps on.


Here's the set of them all glued up. 


Next I laminated some stock from which to cut the little triangle pieces.  I inserted each hatch into it's proper hole and shimmed them in  the center.  Then applied thickened epoxy to the triangles and shot them with three pins each to locate and clamp them.  No additional clamping needed for those.  I then removed the hatch covers and cleaned up the epoxy squeeze-out. 


Getting these little triangles installed under the cockpit sole was the piece of work that has been holding me up from getting the cockpit sole glued down. See next post...

Tuesday, March 11, 2014

Cabin and front deck beams, cockpit sole cleats installed

I have now constructed and installed the beams that support the cabin roof and the front deck.  

Installing the deck beams fixes the bow transom in place, and I wanted to be very sure that it was centered.  The keel piece had somewhat of a bend to it, so I carefully measured from the corners of B3 to the top corners of the bow from both sides.  I pulled the bow over to the right and held it in place with a stick and two clamps.


Then measured again.  And eyed it up from the front.  And measured again...  Finally decided to go ahead and glue up the beams with thickened epoxy.


Here the ends of the deck beams poke through B2.  


After the epoxy cured and I removed the clamp I measured again.  And it wasn't straight.  <sigh>  So I softened up the epoxy with a heat gun where the beams pierced B2 and pulled it over to the right a little more and reclamped.  2nd try was perfect, so I went ahead and reinforced all the joints with fillets to fix things permanently in place.

Here's a shot of the cabin roof support beams.  Before installing these, I drilled a couple 3/8" holes and chamfered the edges.  These are in case I want to hang something from these supports sometime.  I also rounded over the edges that didn't meet other pieces, and then coated with 2 coats of epoxy.


I also cut and installed the cockpit sole cleats, except for the ones aft of B7.  These were installed with thickened epoxy.  I could clamp the side to side ones with bar clamps, but for the fore and aft cleats I braced them against each other with sticks.  This method of clamping is handy when it works. In both cases, I carefully aligned the cleats, then shot in a couple pins from my 23 gauge pin nailer to keep them from sliding around, then applied clamping pressure.


And here's the view after removing the clamps.  Looks nice.  One of my next steps will be to epoxy coat and paint all the interior spaces that will be easier to get at now while there are no hull panels to reach over. 


Saturday, February 8, 2014

Centerboard case assembled, spacers created


I have decided to build the centerboard case outside of the boat for several reasons.  Primarily I wanted to be able to put the case on the drill press to ensure the centerboard pivot holes are perpendicular and perfectly in line.  In addition, this also lets me glue on the flat, and I can use clamps vs. drilling screw holes and having to fill those in afterward.  

I took quite a bit of time to ensure all parts were aligned, then made marks so I could replace things in the right place.  I applied unthickened epoxy to the bare wood of the case ends to make sure they were saturated, and then followed that up with thickened epoxy on both the end pieces and the case sides.

Once the glue was applied, everything was very slick, but I aligned marks and then fired in a couple pins from my pin nailer, which kept the pieces from sliding around when I applied the clamps.  That worked well.

Both these plywood pieces had a bit of a twist in them, so you can see I have the far right corner clamped down to the heavy table, and the leftmost corner pushed down with a go-bar against the ceiling to take out the twist.


Gentle clamping pressure was applied to avoid starving the joints, and the inner case corners were smoothed over with a long dowel.  In this photo you can see the end of a couple long spacer sticks lying the long way in the case to keep the sides the right distance part and make sure there is no overall bowing of the part.


I also set up the rudder and centerboard on the drill press and drilled the pivot holes out oversized.


And filled them with thickened epoxy.  After that's dry, I'll drill the holes out to accept bronze bushings.


To keep the installed centerboard in the middle of the case, I visited the local hardware store looking for some large nylon washers, but didn't find anything appropriate.  So I looked around the shop and found this chunk of plastic I picked up at a salvage yard some years ago.  I've already used a corner of this for something, can't remember what.  I traced a circle and cut it out with the bandsaw, then did my best to resaw it the thin way to yield two blanks.


As you can see below, that didn't go too well, as I had trouble with the blade wandering.  But I have plenty of thickness to work with and one flat face to start with.  I attached piece of plywood to the faceplate of the lathe, and used double stick tape to attach the plastic to that.


I faced off the plastic until it was smooth and about the right thickness (just over 1/8th inch), and trimmed the outside edge to make it round.


Then drilled the center hole.


Here's the plastic stock, rough blank, and finished part.


And here's a picture showing the overall size of the spacers on the centerboard.  They are about 3 inches across, which seems a good size to me.


Tuesday, December 17, 2013

Mast trunk assembly


Tonight I assembled the mast trunk.  It's great to finally start putting something together!

It was a little bit tricky to get everything aligned and square and fixed in place while sliding around on epoxy thickened with silica.  I used a bunch of clamps, but just snugged them up enough to bring parts into place without squeezing out all the glue.


In two locations I fixed things in place with my 23-gauge pin nailer and 1" stainless pins.  You can just see the tiny holes here.  I had removed the plastic tip guard to clear a jam and forgot to reinstall it, so the pins are set a little deep.


And since I had a little left over epoxy, I used that to glue together the puzzle joint joining the two halves of bulkhead 7.