Showing posts with label mast. Show all posts

Sunday, March 15, 2015

Mast support blocks cut and fit

With my mast rounded and epoxy coated I decided to complete the parts needed to actually hold it in the boat.  SCAMP is similar to other small sailboats in that the mast is secured in two spots, at the base and somewhat further up.  This design has a mast trunk, a box that the mast fits in  (see this post: <mast-trunk-installed>), so two blocks need to be made that fit the mast and the trunk, and hold the mast tipped aft at a 2 1/2 degree angle.

I used a scrap of pine cut from a lumberyard 2x6 to make the upper block. Rather than attempting to tilt the drill press head to exactly 2.5 degrees, I instead left it vertical and made a ramp to hold the wood at the correct angle.

This was a good chance to drag out the old high-school trigonometry to calculate some dimensions. I could figure the length of the ramp needed assuming I would put a 3/4" shim under the end of it.


As it happened, I took my 3/4" shim and first jointed one face of it at 2.5 degrees, so the height ended up about 5/8" rather than 3/4".  Not a problem, I just recalcuated the position based on the lower height and glued the shim in place.


I then added a fence, clamped the ramp to the drill press, and clamped my stock to the fence.  I didn't want the 3" hole saw to grab and fling things around.  I drilled until the pilot bit cleared the other side, clearing the sawdust frequently, and then flipped the stock over and completed the cut from the other side.


I did a test fit on the mast and things were pretty close.  However, it would be very difficult and messy to epoxy the block on if it had to slide over the end of the mast, so I cut it in two pieces, and enlarged the opening as needed to make up for the saw kerf until I had a nice fit.  I then trimmed the block to width and length and epoxied it on, using a level to make sure it was aligned with the square block on the base of the mast.


Note that when cutting the block to length another session of trig came in handy to figure out how far off center the hole needed to end up.  Turns out they need to be between 1-1/4" and 1-3/8" offset.


Next I made the block that holds the base of the mast.  Since I glued in a square block at the base of my mast, I needed to make a block with a square hole, angled at 2 1/2 degrees.  I have about another half page of sketches figuring out the correct dimensions to make this up from four pieces of wood as shown below.

OK, five pieces.  I was not thinking clearly at one point and cut off my blank in the wrong place, so the hole wasn't where it belonged.  Rather than starting over, I decided to trim the far end and add a piece on the near end to move the hole over.


The center portion of this lower block is made of 2x material, which ends up not thick enough to hold the mast plug off the bottom once the taper is cut.  That's why the side runners are deeper.  This has the side benefit of providing space underneath for water drainage and ventilation.

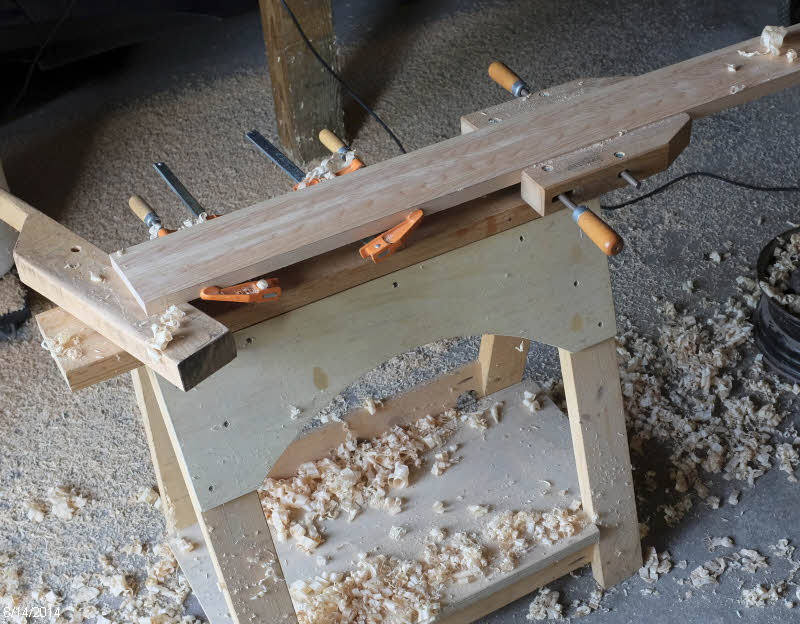
I epoxied the pieces together and then cut the top at a 2 1/2 degree angle and rounded all the edges.  2 1/2 degrees doesn't sound like much, but as you can see it's quite noticable.  Over the 16 foot length of the mast it tips the top back over 8 inches.


Here's the lower mast step ready for a coat of epoxy.  This piece will remain in the boat when the mast is removed, while the upper block is epoxied to the mast and is removed with the mast.  I coated the inside of the step and the square block with graphite thickened epoxy to make them slide together easily. 


I won't be able to see how easily the mast inserts until I have the boat out where there's no ceiling overhead, but I think this will work well.


Sunday, March 1, 2015

Mast and spars - final sanding and shaping

With the mast fairly round after my work with the hand plane, I continued with the final sanding.  I used a power sander to knock down the worst of the ridges, but my hand could still feel edges, so I then worked it over a couple times with a long strip of sandpaper, which could wrap around and did a good job of taking off the high spots.  It's pretty round now, and I've judged it good enough. Here's a shot of the base:


This is what a scarf joint looks like in one of the staves.


I then took my shinto rasp to the top end for a rough shaping.


And then finished up with 80-grit sandpaper over a foam sanding block.  80-grit is the finest I've used anywhere on the boat.


I then spent some time figuring out where the sail would lay on the spars, so I could determine where to drill the holes to hold the ends of the sail to the boom and the yard.  This took a while on the boom, as I also was figuring out where the eye straps and cheek blocks would go that handle the reefing lines.  I built my boom 6" longer than the plans, and ended up cutting two inches off.


I then rounded off the ends of the boom and yard, and drilled holes to lash the ends of the sail in place.  I coated the inside of the holes with epoxy.


I also rounded off the edges on the base of the mast,


And applied a layer of fiberglass to the plug for wear resistance, as this will be inserted into the mast step with each voyage.


At the same time I filled in some small voids in a couple places on the mast.  These were caused when I had a bit of a glitch routing out the V-grooves. The stave rode up and the router bit cut a little closer to the edge in a couple spots.  I didn't have quite enough epoxy spread in the joint to fill this on initial glue up.


So I brushed in a little unthickened epoxy, which flowed in to fill them completely.


When the epoxy cures I will sand things smooth, run a fillet around the plug in the bottom of the mast, and then coat the mast and spars with epoxy.  As of now I plan to paint the boom and the yard and varnish the mast to show off the wood.

Here's a sneak peak of the start to an upcoming project - I found this one really nice 16' long cedar 2x6 in the rack at Menards.  Nice tight grain and very few knots.  I'm planning to use this to build my yuloh - a Chinese sculling oar that I will use to move the boat when the wind dies.  I'll have more information on that to come.


Sunday, February 22, 2015

Birdsmouth mast glued up

I have had the parts for the mast cut out and ready to go for about six months (see <this post>), and this weekend seemed like the right time to assemble them.

I decided to construct a jig to facilitate holding the staves in position while getting them clamped up.  I gathered a couple sawhorses and several other stands and spaced them out along the length of the mast.  I then measured the mast rough diameter at each station and cut out matching profiles from some 1/4" plywood.

I then attached some short pieces of 3/4 plywood recycled from the building jig to each support so that I would have something to attach the profiles to.  Setting up a laser level made it fairly easy to align the supports.  On each one I had drawn a horizontal line and a vertical line, and layed out and cut my semicircles from the intersection of the two.  Having the lines left over on the supports was key to easy alignment.

Here's a shot showing the vertical alignment.


And here you can see the horizontal alignment.  I held the profiles in place with clamps until satisfied with the alignment, then drove a couple screws through to fix them in position.


This setup ensured the jig was straight in both directions, and aligning the center points automatically took into account the taper in the mast, which is not constant along the length.  Here's an overall view with the mast dry-fit in place.


With the jig set up, I next ensured I had the plugs for the ends of the mast ready to go.  The top end is plugged by a simple octagonal stick about 3/4" thick.  The plug at the base of the mast is also octagonal, but protrudes from the end with a square section that will fit into the mast step.  

I cut away the top of the plug so there would not be an abrupt transition from solid to hollow. An abrupt transition can cause failure at that point if the mast is under bending stress.  That won't be the case here, as this is a short plug about 1 foot long, and the mast is supported well above that height at the cabin roof, but I had seen it done elsewhere and thought I may as well do it.


With all the pieces ready, I lined up all the mast staves and clamped them together.  I thought it would be easier to apply the epoxy this way rather than handling each stave individually, and it worked out well.


I first wet them out with unthickened epoxy using a short 1" section of roller.  I did the V side and the back side, then the V side again.  The idea is to let the wood absorb what it can, so that it doesn't suck the epoxy out of the joint during glue-up, leaving a weak spot.


Once the staves and plugs were wet out, I mixed and spread thickened epoxy on the V side. I made a little custom spreading stick by sanding it to a point and filing notcches in the edge.


The notches leave some epoxy behind, so that there is an appropriate amount distributed along the joint.


Holding the stick at an angle allows it to fit the sides of the V.


No photos of the epoxy spreading, as things were just slightly frantic at this stage - I wanted to be sure the epoxy didn't start to cure before I could get it all clamped up.  I was glad to have my wife's help mixing up epoxy.

Once all the staves were spread with epoxy it was back into the jig with them, which made the alignment and fitting together of the joints a snap.

I used hose clamps to pull the staves together, and then applied zip ties to hold them in place, then moved the clamp down and repeated.  I had a number of hose clamps, so a left them in place periodically, rather than unscrewing them all the way to move them past the next support cradle.


The next day I removed the clamps and saw that things were looking pretty good.


I got out my block plane and planed down the projecting corners to make the mast 8-sided.


And then planed the corners to make it 16-sided


And then then 32-sided.  The mast is now a bit smaller than the support jig cutouts and tends to slide.  I moved the end support and raised it up to provide an end-stop.


And then planed the ridges again to be about 64-sided.  It's a bit hard to be sure where you have planed and where you have not at this point.


Lots of neat curls resulted.  Too bad I can't think of a use for these.


Next I'll switch to sandpaper to remove the remaining ridges, then round off the top and apply some finish.  Not sure yet whether I want to put a couple coats epoxy and then varnish, or maybe go with white paint instead.

Saturday, August 16, 2014

Mast, boom, and yard - making some expensive shavings

A couple posts ago I talked about installing the gunwales and carlins on the hull, and discussed the problems I was having with the epoxied scarf joints giving way under the heat of the steam. To avoid the problem when installing the carlins, I wanted to get those parts in one piece.

My thoughts turned to the four beautiful Sitka Spruce boards I have had taking up space in the garage since April or so.  These were destined to be turned into mast, boom, and yard.  But I took another look at them and realized that with judicious layout and cutting I would have enough stock to get the carlins out, too.

Since the carlins were next to be installed, I decided it was time to cut up the spruce.  These boards are so long that I had to move my tools out to the garage so that I could send the outfeed end into the great outdoors.


My first step was to snap a chalk line, set up a fence and trim with a portable circular saw to get a straight edge to bear against the fence. 


Then I made some sawdust.  Here are the eight mast staves, two pieces of the yard, two pieces for the boom, and the stock for the two carlins.  I cut off the extra length from the long carlin to scarf onto the ends of two mast staves that came out of a board that was just a bit too short. 


I sent everything through the surface planer to reduce them to dimension,  and then scarfed the two short mast staves.


I then laminated the boom and yard.


Next up was to taper the mast staves.  I decided to do this by clamping them all together and planing them down.  I layed out guide lines on the two outer staves so I could tell when I was done.


I took off the bulk of the wood with a power planer, and then finished up with hand tools, which are more precise and controllable. 


After planing the taper, I applied two coats of epoxy to what will be the inner surfaces of the hollow mast.


I set up my birdsmouth cutter in the router table to cut the edges.  I test fit the parts, and it looks like it will make a mast.  Here's the diameter of the base. 


And here's the size of the top end.


The boom and yard have tapers on each end.  I was able to saw away some of the wood on the boom, but the remainder of the machining on that and all of the shaping on the yard was with hand planes, which made an impressive pile of shavings.


Next up with these parts will be to make the plugs for the ends of the mast and glue that up, round off the corners of the boom, and plane the mast and yard to final round dimensions.