Showing posts with label fiberglass. Show all posts

Sunday, March 1, 2015

Mast and spars - final sanding and shaping

With the mast fairly round after my work with the hand plane, I continued with the final sanding.  I used a power sander to knock down the worst of the ridges, but my hand could still feel edges, so I then worked it over a couple times with a long strip of sandpaper, which could wrap around and did a good job of taking off the high spots.  It's pretty round now, and I've judged it good enough. Here's a shot of the base:


This is what a scarf joint looks like in one of the staves.


I then took my shinto rasp to the top end for a rough shaping.


And then finished up with 80-grit sandpaper over a foam sanding block.  80-grit is the finest I've used anywhere on the boat.


I then spent some time figuring out where the sail would lay on the spars, so I could determine where to drill the holes to hold the ends of the sail to the boom and the yard.  This took a while on the boom, as I also was figuring out where the eye straps and cheek blocks would go that handle the reefing lines.  I built my boom 6" longer than the plans, and ended up cutting two inches off.


I then rounded off the ends of the boom and yard, and drilled holes to lash the ends of the sail in place.  I coated the inside of the holes with epoxy.


I also rounded off the edges on the base of the mast,


And applied a layer of fiberglass to the plug for wear resistance, as this will be inserted into the mast step with each voyage.


At the same time I filled in some small voids in a couple places on the mast.  These were caused when I had a bit of a glitch routing out the V-grooves. The stave rode up and the router bit cut a little closer to the edge in a couple spots.  I didn't have quite enough epoxy spread in the joint to fill this on initial glue up.


So I brushed in a little unthickened epoxy, which flowed in to fill them completely.


When the epoxy cures I will sand things smooth, run a fillet around the plug in the bottom of the mast, and then coat the mast and spars with epoxy.  As of now I plan to paint the boom and the yard and varnish the mast to show off the wood.

Here's a sneak peak of the start to an upcoming project - I found this one really nice 16' long cedar 2x6 in the rack at Menards.  Nice tight grain and very few knots.  I'm planning to use this to build my yuloh - a Chinese sculling oar that I will use to move the boat when the wind dies.  I'll have more information on that to come.


Sunday, February 15, 2015

Rudder hardware alignment

The block of laminated plywood shown below, which I call the rudder head, attaches to the transom of the boat and connects the tiller (steering handle) with the rudder.  I've previously detailed the construction of this part and that post is < here >

I have had the hardware (pintles and gudgeons) that attach this to the boat on hand for some time, and recently went ahead and took the time to get them installed.


Because the rudder head is somewhat thicker than the cast bronze hardware, I needed to carve out recesses.  I marked out the outlines and started trimming away with a chisel.


After some work and repeated fittings the bottom part is in place. That wasn't so bad.  


I debated for a while about just where to put the top fitting.  I wanted the separation between the two fittings to be as large as possible.  On the bottom one I had to avoid the recess where the rudder fits.  On the top one I had to make sure the mounting screws would not hit the haul line tubes which run inside. Once the location was decided, I carved away wood so the top fitting would fit.

I then mounted the corresponding parts to a piece of board and checked the fit.  I found that the rudder head did not slip smoothly onto the transom fittings, a sign of an alignment problem.

I thought for some time about how to check the alignment of parts.  Just eyeing things up didn't seem to be sufficient.  Since each half of the fitting has a part with a hole (the gudgeon), and one with a rod (the pintle). I hit upon the idea of putting a close-fitting rod through the gudgeon hole and checking the alignment with the pintle.  I went through my scrap supplies and found that I had an old aluminum arrow shaft that was the perfect size.  Putting this through the gudgeons showed up the alignment problem.

Now that I had a way to check my alignment accuracy I could take steps to get things lined up. Starting with the pintle that mounts on the transom, I put it on a surface plate (very flat surface), and used a taper gauge to check the height of the pin at each end.  I found that the pin was parallel to the surface plate and didn't need any work, so that was good.


Putting the arrow shaft through the gudgeon and doing a similar measurement, I found the rod was not parallel to the surface.  So I put the part in the vice and started filing off the high side.


Without too much effort I got the parts to align well.


With these parts aligned, I knew that if I could do a similar alignment on the rudder head half that my problem would be solved. 


Here's the setup for checking the alignment on the rudder head. 


In this case, adjustment was not so easy, as I had to carve away plywood to get things to line up, but eventually I got it pretty close. 


Mounting the transom half to a test board things now slid together pretty well.  

My next step was to figure out where on the transom to put the parts.  I drew a center line for left/right alignment, and then clamped the parts on and adjusted for vertical height.


I needed to make sure the tiller handle had clearance in the transom opening, and wanted to have my rudder uphaul/downhaul lines clear the edge.


Once I finalized the position I marked the heights of the parts, then removed the rudder head.  I again used the arrow to make sure the fittings were aligned, and drilled bolt holes.  I decided to install fiberglass patches on the inside of the transom to toughen up this surface and keep the nuts from digging in.

When I drilled the holes, I had a little chip-out, so I filled that (the white in the photo below) before applying the fiberglass patches. 


After the epoxy cured, I used a  scraper to taper down the edges, and then applied some fairing compound to blend them in. 


When that cures a little sanding should have this ready for paint.  It's nice to have these parts ready now to install.

Sunday, November 30, 2014

Skegs finally finished and installed

With one thing and another, I've been working on finishing these skegs for far longer than I thought it would take.  In the previous post I covered how I shaped the skegs from two layers of 3/4" plywood.  The next step was to sheath them with fiberglass cloth.  

To make best use of the cloth I cut strips off the width of the 50" cloth.  It took two pieces per side, for a total of 8 pieces, which overlap on what will be the bottom edge.  

Because of the finger hold cutouts I didn't feel I could apply one piece from one side around the edge and down the other.  So applying one piece at a time on each side, I had at least four separate sessions to apply all the cloth.

Getting the cloth to conform to the fingerholds took a lot of prodding with the epoxy brush to keep the glass from pulling up and allowing air bubbles underneath.  That went on for an hour or so after laying the cloth until the epoxy started to cure.  


Before applying the glass I had rounded over the edges of the finger holds with sandpaper, except for one that I either forgot to do, or didn't round enough.  I could not get the cloth to stay down, so I put on a layer of release fabric and clamped a dowel of the right size in place.


That worked pretty well, though the dowel was a bit of trouble to break loose.  I could have just put packing tape over the dowel and skipped the release fabric, but I wanted to try out the fabric.

After I got all the fiberglass applied, I had multiple sessions of applying fairing compound, sanding it smooth, and iterating on the low spots.  While I had the fairing mix made, I took the opportunity to do a little more work on the rudder and centerboard, which I had set aside short of completion some time ago.


I'm going to put UHMW plastic on the edges of the skegs, so I ripped about 1/4" off my 1 1/2" wide stock, rounded the ends, and routed the edges.  I'm going to countersink stainless screws into this to hold it on.


To keep water from following the screws and getting under the fiberglass, I drilled oversize holes to fill with epoxy.  I'll then drill pilot holds into the epoxy plugs to drive the screws in there.


Here's a shot of my old Delta drill press, which has a swivel head.  I think this is the only time I've ever swiveled it...


Here I've filled the holes with epoxy thickened with wood flour.


And here's the result after removing the excess. 


To locate the skegs on the boat and ensure they are parallel and equally spaced from center, I taped down a reference line and measured out from that. 


I applied thickened epoxy, and braced the skegs from the ceiling.  Not much pressure was needed.  

I didn't find a specific measurement for how wide to space the skegs, so I guessed at a spacing that looked right to me.  I wanted to leave enough space next to the centerboard slot to allow for the fillet, the tape to adhere the centerboard slot gasket, and room for the gasket to flex.


After the epoxy cured, I ran a fillet around the edges.


Heres' an overall view.  Looking good!


I finished off the fillets by sanding them a bit with a small dowel wrapped in sandpaper.  It didn't take long and they smoothed out very nicely.  These are now some of the nicest fillets no one will ever see...


Now I will give the final sanding to the hull panels, and it will be time to slap on some paint!

Thursday, October 2, 2014

Fiberglassing the hull

With the hull bottom filled, sanded, and edges rounded over I could proceed to apply fiberglass.  I purchased 50" wide fiberglass, which I believe is the widest that is generally available.  Even so, this width is not wide enough to cover the hull bottom and both garboard panels, so a seam is needed.

I determined that I could lay the cloth on the hull so the seam would run through the middle of the centerboard slot, reducing the amount of overlap that needs to be faired and smoothed over.  I covered the remainder of the hull with a leftover piece of a narrower width left over from a previous kayak project.


After trimming the edges I started saturating the fiberglass.  Rather than using a squeegee this time, I used a roller to apply the epoxy.  This worked well, was very controllable, but was somewhat slow.


Job done.  Here you can see the overlap seam aft of the centerboard slot.  As it turns out, this will be near the skeg that is installed later, so any unevenness in the seam will be fairly unobtrusive.  Another reason to run the seam here vs. down the center of the hull bottom.


Here's where I ran the seam in front of the centerboard, minimizing the amound of fairing I will need to do.


I also applied cloth to the bow and stern transoms, and overlapped that onto the hull panels. This was a little fussy, as I had to cut away around the hull strake laps.


And here's a shot with the first coat of thickened epoxy on the cloth, and the 2nd coat of epoxy on hull panels 2 and 3.


After I finish filling the weave of the fiberglass, the skegs get installed, and then paint.

Cabin roof fiberglass applied

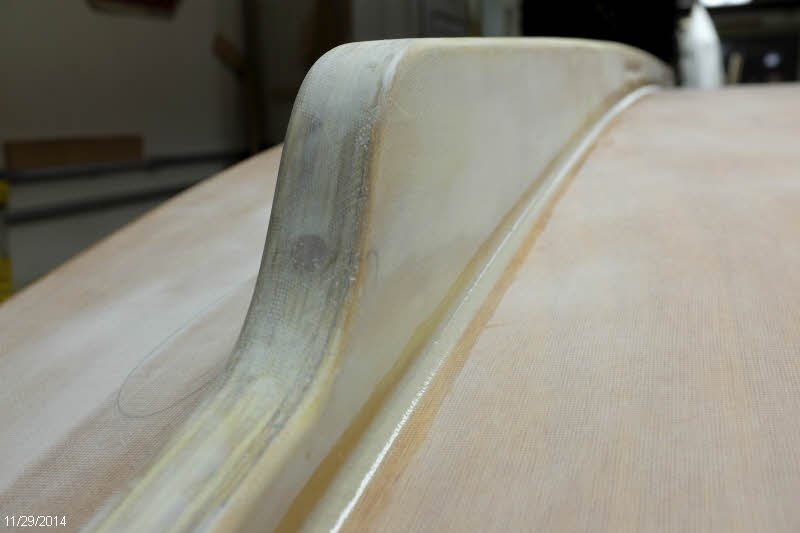
With all the edges of the roof built up as described in the previous post, I gave the edges a good round over in preparation for fiberglass.  I also rounded the bottom of the cleat up in front to match the curve of the roof edge - I think that's a nice visual detail.


I cut a piece of cloth large enough to cover the entire cabin roof.  This was 50" wide cloth.


Then cut a hole in the middle for the mast trunk to poke through


And trimmed the edges to minimize the overhang there. 


I saturated the cloth with epoxy and watched the glass go clear.  I poured on the epoxy and used a 6" plastic squeegee to spread it around. 


After the epoxy cured I could trim back the ragged edges with a utility knife and then sand them with sandpaper on a wood block.


Which left things looking pretty nice.


Next I applied epoxy thickened with microballoons (tiny glass spheres) to fill the weave.  On this first coat I used the squeegee to spread it around, but on the follow-up coats I put it on with a roller, which was easier to control and gave a more consistent thickness.


Here's what it looked like after sanding.  Hard to know when this job is done.  I can still see the fiberglass cloth at this point, and that's OK as long as the surface is smooth.


It was fun to see this part of the project take shape.  This little curved cabin roof was a design feature that first caught my eye with this boat design.