Showing posts with label plane. Show all posts

Sunday, February 22, 2015

Birdsmouth mast glued up

I have had the parts for the mast cut out and ready to go for about six months (see <this post>), and this weekend seemed like the right time to assemble them.

I decided to construct a jig to facilitate holding the staves in position while getting them clamped up.  I gathered a couple sawhorses and several other stands and spaced them out along the length of the mast.  I then measured the mast rough diameter at each station and cut out matching profiles from some 1/4" plywood.

I then attached some short pieces of 3/4 plywood recycled from the building jig to each support so that I would have something to attach the profiles to.  Setting up a laser level made it fairly easy to align the supports.  On each one I had drawn a horizontal line and a vertical line, and layed out and cut my semicircles from the intersection of the two.  Having the lines left over on the supports was key to easy alignment.

Here's a shot showing the vertical alignment.


And here you can see the horizontal alignment.  I held the profiles in place with clamps until satisfied with the alignment, then drove a couple screws through to fix them in position.


This setup ensured the jig was straight in both directions, and aligning the center points automatically took into account the taper in the mast, which is not constant along the length.  Here's an overall view with the mast dry-fit in place.


With the jig set up, I next ensured I had the plugs for the ends of the mast ready to go.  The top end is plugged by a simple octagonal stick about 3/4" thick.  The plug at the base of the mast is also octagonal, but protrudes from the end with a square section that will fit into the mast step.  

I cut away the top of the plug so there would not be an abrupt transition from solid to hollow. An abrupt transition can cause failure at that point if the mast is under bending stress.  That won't be the case here, as this is a short plug about 1 foot long, and the mast is supported well above that height at the cabin roof, but I had seen it done elsewhere and thought I may as well do it.


With all the pieces ready, I lined up all the mast staves and clamped them together.  I thought it would be easier to apply the epoxy this way rather than handling each stave individually, and it worked out well.


I first wet them out with unthickened epoxy using a short 1" section of roller.  I did the V side and the back side, then the V side again.  The idea is to let the wood absorb what it can, so that it doesn't suck the epoxy out of the joint during glue-up, leaving a weak spot.


Once the staves and plugs were wet out, I mixed and spread thickened epoxy on the V side. I made a little custom spreading stick by sanding it to a point and filing notcches in the edge.


The notches leave some epoxy behind, so that there is an appropriate amount distributed along the joint.


Holding the stick at an angle allows it to fit the sides of the V.


No photos of the epoxy spreading, as things were just slightly frantic at this stage - I wanted to be sure the epoxy didn't start to cure before I could get it all clamped up.  I was glad to have my wife's help mixing up epoxy.

Once all the staves were spread with epoxy it was back into the jig with them, which made the alignment and fitting together of the joints a snap.

I used hose clamps to pull the staves together, and then applied zip ties to hold them in place, then moved the clamp down and repeated.  I had a number of hose clamps, so a left them in place periodically, rather than unscrewing them all the way to move them past the next support cradle.


The next day I removed the clamps and saw that things were looking pretty good.


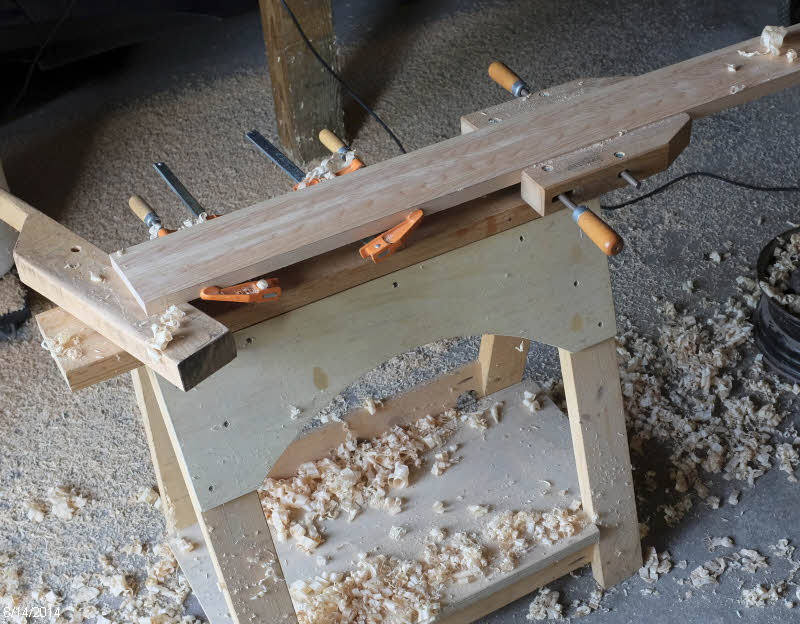
I got out my block plane and planed down the projecting corners to make the mast 8-sided.


And then planed the corners to make it 16-sided


And then then 32-sided.  The mast is now a bit smaller than the support jig cutouts and tends to slide.  I moved the end support and raised it up to provide an end-stop.


And then planed the ridges again to be about 64-sided.  It's a bit hard to be sure where you have planed and where you have not at this point.


Lots of neat curls resulted.  Too bad I can't think of a use for these.


Next I'll switch to sandpaper to remove the remaining ridges, then round off the top and apply some finish.  Not sure yet whether I want to put a couple coats epoxy and then varnish, or maybe go with white paint instead.

Tuesday, September 2, 2014

Deck supports complete

With the carlins steamed and bent into shape,  epoxying them into place was the next step. A couple clamps were needed to keep them in place until the epoxy cured.


Next up was planing the top surfaces of the carlins and gunwales so that the deck would lay flat on them.  The block plane was the tool of choice, and it made lots of fun curly shavings when held at an angle to the stock.


Nice looking result.  I went ahead and filleted around the carlin/bulkhead joints at this point.


Between B3 and B4 I drilled a series of holes to provide convenient anchor points for small items.


Up front I installed a couple cleats at the bow in case I need to anchor anything there.  At this point I'm thinking I'll have an open cleat there to lead the painter through if I have one attached to the bow eye.


When I test fit the deck I discovered that the plywood cleat that supports the aft end of the front deck was about 1/8" too low with respect to the cleats.  To fix that I covered a light batten with packing tape and sprung it across the cleats where the deck would lie.  I put another piece of packing tape on the face of B2, and filled the space under the batten with thickened epoxy.


After it cured, I removed the batten and peeled off the tape.  A nice clean job resulting in a perfectly fit spacer to support the back of the deck.


Saturday, August 16, 2014

Mast, boom, and yard - making some expensive shavings

A couple posts ago I talked about installing the gunwales and carlins on the hull, and discussed the problems I was having with the epoxied scarf joints giving way under the heat of the steam. To avoid the problem when installing the carlins, I wanted to get those parts in one piece.

My thoughts turned to the four beautiful Sitka Spruce boards I have had taking up space in the garage since April or so.  These were destined to be turned into mast, boom, and yard.  But I took another look at them and realized that with judicious layout and cutting I would have enough stock to get the carlins out, too.

Since the carlins were next to be installed, I decided it was time to cut up the spruce.  These boards are so long that I had to move my tools out to the garage so that I could send the outfeed end into the great outdoors.


My first step was to snap a chalk line, set up a fence and trim with a portable circular saw to get a straight edge to bear against the fence. 


Then I made some sawdust.  Here are the eight mast staves, two pieces of the yard, two pieces for the boom, and the stock for the two carlins.  I cut off the extra length from the long carlin to scarf onto the ends of two mast staves that came out of a board that was just a bit too short. 


I sent everything through the surface planer to reduce them to dimension,  and then scarfed the two short mast staves.


I then laminated the boom and yard.


Next up was to taper the mast staves.  I decided to do this by clamping them all together and planing them down.  I layed out guide lines on the two outer staves so I could tell when I was done.


I took off the bulk of the wood with a power planer, and then finished up with hand tools, which are more precise and controllable. 


After planing the taper, I applied two coats of epoxy to what will be the inner surfaces of the hollow mast.


I set up my birdsmouth cutter in the router table to cut the edges.  I test fit the parts, and it looks like it will make a mast.  Here's the diameter of the base. 


And here's the size of the top end.


The boom and yard have tapers on each end.  I was able to saw away some of the wood on the boom, but the remainder of the machining on that and all of the shaping on the yard was with hand planes, which made an impressive pile of shavings.


Next up with these parts will be to make the plugs for the ends of the mast and glue that up, round off the corners of the boom, and plane the mast and yard to final round dimensions.

Friday, March 21, 2014

Transom installed

I'm itching to start getting hull panels installed, and not having the transom installed on the boat was one of the things standing in the way.

Earlier I had epoxied the transom doubler on to the transom while the two parts were off the boat and easy to handle and work with.  But one potential problem I could forsee was possible difficulty in getting the cockpit sole (the floor) installed later on, since that piece fits up against the transom and fits under the doubler.  And is a tight fit up forward.

I had read of another builder who ended up trimming the aft edge of the sole off to get it installed.  I'd prefer to not do that, so I decided to plane off the corner of the doubler at the bottom to give me some clearance to install the sole later on.

I got out my trusty #5 plane with the Hock blade and started making shavings.


It didn't take long and the job was done.  I really like using the plane - such a sense of getting something done!


Looks pretty good as I dry fit the transom.


So I mixed up some thickened epoxy and installed it.