Showing posts with label fillet. Show all posts

Saturday, February 7, 2015

Seat back tops laminated and installed

Before doing any more painting I next wanted to create and install the tops on the seat backs. This is the last structural part of the boat to be built, so getting this done is a great milestone.

I've been thinking over time how I wanted to handle this part.  Some builders don't have any trim installed in this area, and some builders have fairly wide tops installed, the better to sit on. Because I don't yet know whether I'll want to perch up there much, and don't know where the favored location will be if I do, I decided to just install a medium wide top, as I can always modify that later if I want to.

I decided on a top that is about 3/4" thick and 2" wide.  I laminated this up from four 1/2" strips of pine, which take the bend fairly easily.


I put clear packing tape on the tops of the seats, so that I could laminate the tops in place. It was another glue-up that took most of my clamps.  I used C-clamps to clamp sticks to the seatback on the inner part of the curve, then pulled in the ends with the handscrew clamps.  I used lightweight bar clamps down to the bottom of the seat back to pull the top down to the curve, some small bar clamps with sticks to align the top of the lamination, and some small bar clamps and c-clamps to hold the laminations together.  Quite a conglomeration.


After the epoxy cured I had two tops that were curved just right to fit the seat backs.


I knocked off most of the squeeze out with a scraper, and then a quick trip through the planer had them looking nice.


The next step was to determine the edge profile.  I cut off a bit of the extra length and layed out three different radii on the edges.  My largest roundover bit is 1/2" radius, so I used that on the inner top.  I didn't want the outer edge to be completely rounded over, so used a smaller bit on the bottom edge of that.


The only tricky part to fit was the return at the front of the cockpit.  This has a compound bevel where it meets the cabin side, and it's easy to get too short as you sneak up on the right fit. 


But I got this side just about perfect.  As for the one on the other side, well, that's what thickened epoxy is for...


I primed the bare wood with unthickened epoxy, and then used silica-thickened epoxy to glue down the parts. After the epoxy cured and the clamps were cleared away I was pleased with the way things were looking.


And a little sanding dresses it up even further.


When I clamped these for gluing, I tried to let them hang over to the inside just a bit, so that I could bring them back flush with spokeshave, sandpaper and scraper.  This shot is from before I did that.


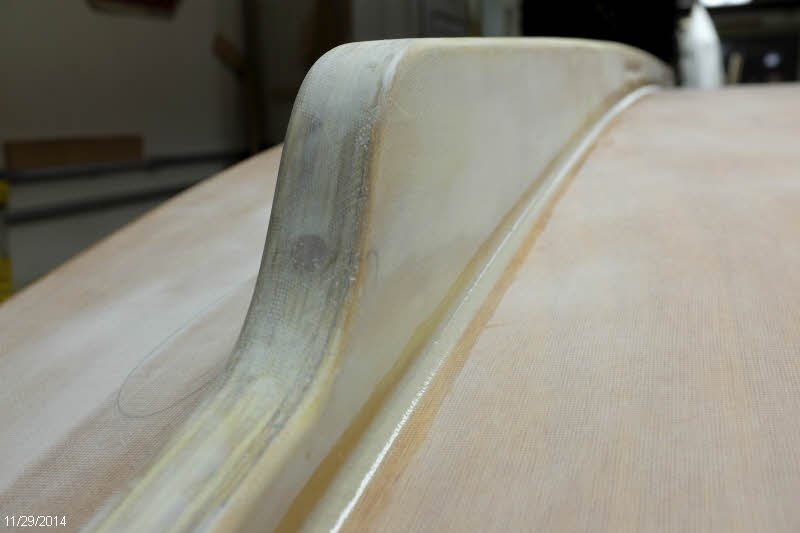
After bringing the insides flush and cleaning up a bit of squeeze out on the underside I sanded them all over and then finished up with a fillet of epoxy.  Here at the cabin junction:


And all along underneath the edge.


I climbed in the boat and tried them out and found this bit of wood provides a really nice arm rest with no sharp edges, and sitting up on top for a bit to stretch my legs if wanted should be very doable, too.  All in all a nice looking and functional addition to the seat backs that finishes things off nicely.

Sunday, November 30, 2014

Skegs finally finished and installed

With one thing and another, I've been working on finishing these skegs for far longer than I thought it would take.  In the previous post I covered how I shaped the skegs from two layers of 3/4" plywood.  The next step was to sheath them with fiberglass cloth.  

To make best use of the cloth I cut strips off the width of the 50" cloth.  It took two pieces per side, for a total of 8 pieces, which overlap on what will be the bottom edge.  

Because of the finger hold cutouts I didn't feel I could apply one piece from one side around the edge and down the other.  So applying one piece at a time on each side, I had at least four separate sessions to apply all the cloth.

Getting the cloth to conform to the fingerholds took a lot of prodding with the epoxy brush to keep the glass from pulling up and allowing air bubbles underneath.  That went on for an hour or so after laying the cloth until the epoxy started to cure.  


Before applying the glass I had rounded over the edges of the finger holds with sandpaper, except for one that I either forgot to do, or didn't round enough.  I could not get the cloth to stay down, so I put on a layer of release fabric and clamped a dowel of the right size in place.


That worked pretty well, though the dowel was a bit of trouble to break loose.  I could have just put packing tape over the dowel and skipped the release fabric, but I wanted to try out the fabric.

After I got all the fiberglass applied, I had multiple sessions of applying fairing compound, sanding it smooth, and iterating on the low spots.  While I had the fairing mix made, I took the opportunity to do a little more work on the rudder and centerboard, which I had set aside short of completion some time ago.


I'm going to put UHMW plastic on the edges of the skegs, so I ripped about 1/4" off my 1 1/2" wide stock, rounded the ends, and routed the edges.  I'm going to countersink stainless screws into this to hold it on.


To keep water from following the screws and getting under the fiberglass, I drilled oversize holes to fill with epoxy.  I'll then drill pilot holds into the epoxy plugs to drive the screws in there.


Here's a shot of my old Delta drill press, which has a swivel head.  I think this is the only time I've ever swiveled it...


Here I've filled the holes with epoxy thickened with wood flour.


And here's the result after removing the excess. 


To locate the skegs on the boat and ensure they are parallel and equally spaced from center, I taped down a reference line and measured out from that. 


I applied thickened epoxy, and braced the skegs from the ceiling.  Not much pressure was needed.  

I didn't find a specific measurement for how wide to space the skegs, so I guessed at a spacing that looked right to me.  I wanted to leave enough space next to the centerboard slot to allow for the fillet, the tape to adhere the centerboard slot gasket, and room for the gasket to flex.


After the epoxy cured, I ran a fillet around the edges.


Heres' an overall view.  Looking good!


I finished off the fillets by sanding them a bit with a small dowel wrapped in sandpaper.  It didn't take long and they smoothed out very nicely.  These are now some of the nicest fillets no one will ever see...


Now I will give the final sanding to the hull panels, and it will be time to slap on some paint!

Thursday, October 2, 2014

Rolling the hull and prepping for fiberglass


Now came a moment I'd been anticipating for a long time - rolling over the hull.  To prep for this I got 4 hefty eye bolts and screwed them into the ceiling joists.  After removing the four screws holding the boat to the jig, I looped my big cargo straps under the hull, ratcheted it up, and removed the building jig.


I resisted the urge to climb in and sway around and pretend I was at sea...


I was able to roll the boat pretty easily, while my wife watched that the front strap didn't slip off the bow.  The hull didn't really spin freely in the straps - I had to lift and slide.


When it was completely upside down I placed a couple sawhorses under the seats after measuring to ensure they were tall enough to keep the cabin roof off the floor.

These straps quick release rather than gradually lowering, so we worked this by me supporting the boat, my wife releasing the strap, then I would lower the boat a bit and she would tighten the strap again to support it.  It took a couple iterations, switching from one end of the boat to the other, and then we were securely on the saw horses. About a half hour process overall.

With the hull upside down I could clean up around the ballast tank drain.


And trim off the ends of the centerboard case. 


And fillet the hull panels and fill in the garboard/hull bottom joint with thickend epoxy.


After that cured I gave that joint a generous round-over,


And also rounded over the hull panels where they join the bow and stern transoms. 


And routed a round-over around the centerboard case opening.


I finished up by sanding the hull in the areas that will have fiberglass applied, to remove any rough spots.  

I feel good about getting past this step of the process!

Thursday, September 11, 2014

Cabin roof installed

With the cabin sides installed and the cleats attached and beveled, the next step was to install the cabin roof.  I had been a bit apprehensive about this because of the difficulty of clamping.  

I put a couple boards across the roof and used two web straps to pull the roof to the curve of the supports.  The front strap is attached to the building jig under the hull, and the rear strap goes through the portholes and hooks into the hatch cutouts in the front face of bulkhead 4.


The straps pulled the top into the general position, but it was clear I'd have to do better to keep the top from bowing up, and to get the edges down tight to the cleat.  I decided to use screws for clamps, since it appeared to be the only option.  

To hold down the center I prepared a couple sticks and predrilled the screw holes.  For the edge of the roof I prepared a bunch of blocks to spread the pressure out.   I planed both the sticks and the blocks to the correct thickness to ensure the screws penetrated an appropriate depth. 

I applied thickened epoxy to the supports and screwed down the center of the roof, then bent the roof down with the web straps and screwed the blocks along the edge.


The blocks pulled down the edge real nice, and only one screw stripped out its hole.


 While the epoxy was curing I took the opportunity to spread the first coat of epoxy over the deck and cabin sides.


After the epoxy cured, I removed the straps and the blocks and was happy to find that nothing went 'sproing'.


I planed the edges flush with the cleats and filled the screw holes with fillet mixture. 


At the same time I filleted all the joints underneath between the roof, bulkheads, cabin beams, and sides.  Working through the bulkhead 3 hatch openings I could reach all the joints in that area also.


After the epoxy cured I scraped the nail holes flush and sanded the roof in preparation for fiberglass.  But before that is applied I will attach doublers to the front and rear edges of the roof and round over the front and back edges of the cleats.

I'm glad to have this part installed.  This boat is really starting to look like a SCAMP now.

Tuesday, September 9, 2014

Cabin sides installed

After the deck was installed I moved on to the cabin sides.  Here you see the cleats on the edge of bulkheads 2, 3, and 4.  These are beveled to match the angle of the cabin sides to provide a good glue surface, and I was working on these before gluing down the deck.


Here's the minimal clamping required during the glue up. The sides sit flush with the bottom surface of the deck, so the little leg in the foreground needs to be trimmed a bit, as it sits on top of the deck.  I also elected to cut the little quarter circle drain holes in the cabin side, mostly because I like the way they look.

I've got a little stick clamped to the deck pushing the forward part of the cabin side towards the center of the boat to keep the curve of the side constant.


After the epoxy cured I ran a little fillet along the lower edge of the cabin side to fix that in place.  Later on I will add a larger fillet and fiberglass tape to this joint.


I also glued on the doubler that reinforces the front section.


And filleted inside between the cabin side and the bulkheads. 


And along the bottom of the cabin side where it meets the carlin. After the epoxy cured I softened this edge with sandpaper.


With the sides attached the next step was to make the cleat that will hold the edge of the cabin roof.  There's a gentle curve to this, so I set up the steamer to bend the wood. 


After cooling and drying out I glued it on. 


Here you can see the small filler strip that I also added to the top of the cabin sides, as they were a little bit short. 


Here's the cleat installed. You can see I even remembered to run the bottom edge through the router before gluing it on.


And planed down to match the curvature of the roof, which is next to be installed.