With one thing and another, I've been working on finishing these skegs for far longer than I thought it would take. In the previous post I covered how I shaped the skegs from two layers of 3/4" plywood. The next step was to sheath them with fiberglass cloth.
To make best use of the cloth I cut strips off the width of the 50" cloth. It took two pieces per side, for a total of 8 pieces, which overlap on what will be the bottom edge.
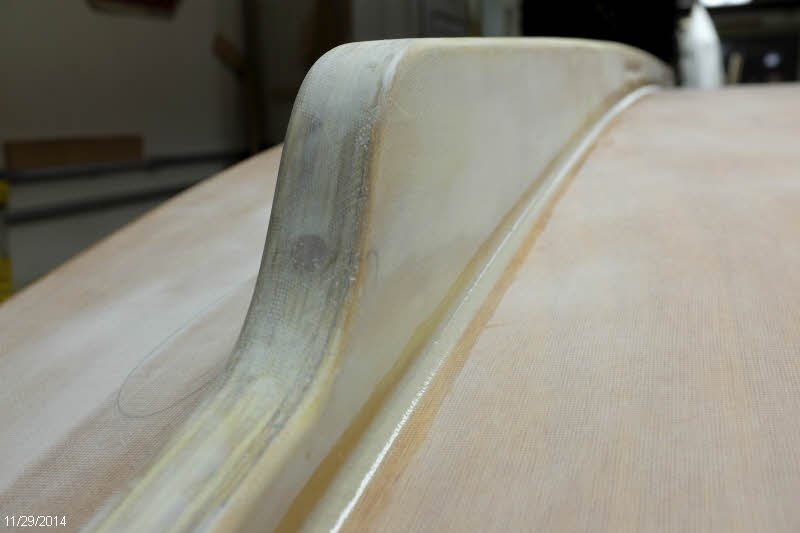
Because of the finger hold cutouts I didn't feel I could apply one piece from one side around the edge and down the other. So applying one piece at a time on each side, I had at least four separate sessions to apply all the cloth.
Getting the cloth to conform to the fingerholds took a lot of prodding with the epoxy brush to keep the glass from pulling up and allowing air bubbles underneath. That went on for an hour or so after laying the cloth until the epoxy started to cure.

Before applying the glass I had rounded over the edges of the finger holds with sandpaper, except for one that I either forgot to do, or didn't round enough. I could not get the cloth to stay down, so I put on a layer of release fabric and clamped a dowel of the right size in place.

That worked pretty well, though the dowel was a bit of trouble to break loose. I could have just put packing tape over the dowel and skipped the release fabric, but I wanted to try out the fabric.
After I got all the fiberglass applied, I had multiple sessions of applying fairing compound, sanding it smooth, and iterating on the low spots. While I had the fairing mix made, I took the opportunity to do a little more work on the rudder and centerboard, which I had set aside short of completion some time ago.

I'm going to put UHMW plastic on the edges of the skegs, so I ripped about 1/4" off my 1 1/2" wide stock, rounded the ends, and routed the edges. I'm going to countersink stainless screws into this to hold it on.

To keep water from following the screws and getting under the fiberglass, I drilled oversize holes to fill with epoxy. I'll then drill pilot holds into the epoxy plugs to drive the screws in there.

Here's a shot of my old Delta drill press, which has a swivel head. I think this is the only time I've ever swiveled it...

Here I've filled the holes with epoxy thickened with wood flour.

And here's the result after removing the excess.

To locate the skegs on the boat and ensure they are parallel and equally spaced from center, I taped down a reference line and measured out from that.

I applied thickened epoxy, and braced the skegs from the ceiling. Not much pressure was needed.
I didn't find a specific measurement for how wide to space the skegs, so I guessed at a spacing that looked right to me. I wanted to leave enough space next to the centerboard slot to allow for the fillet, the tape to adhere the centerboard slot gasket, and room for the gasket to flex.

After the epoxy cured, I ran a fillet around the edges.
Heres' an overall view. Looking good!

I finished off the fillets by sanding them a bit with a small dowel wrapped in sandpaper. It didn't take long and they smoothed out very nicely. These are now some of the nicest fillets no one will ever see...

Now I will give the final sanding to the hull panels, and it will be time to slap on some paint!
Dave, the progress looks awesome. You have taken the time to do such a neat job on your build. Very impressed.
ReplyDeleteBrent