Showing posts with label fairing. Show all posts

Sunday, February 15, 2015

Rudder hardware alignment

The block of laminated plywood shown below, which I call the rudder head, attaches to the transom of the boat and connects the tiller (steering handle) with the rudder.  I've previously detailed the construction of this part and that post is < here >

I have had the hardware (pintles and gudgeons) that attach this to the boat on hand for some time, and recently went ahead and took the time to get them installed.


Because the rudder head is somewhat thicker than the cast bronze hardware, I needed to carve out recesses.  I marked out the outlines and started trimming away with a chisel.


After some work and repeated fittings the bottom part is in place. That wasn't so bad.  


I debated for a while about just where to put the top fitting.  I wanted the separation between the two fittings to be as large as possible.  On the bottom one I had to avoid the recess where the rudder fits.  On the top one I had to make sure the mounting screws would not hit the haul line tubes which run inside. Once the location was decided, I carved away wood so the top fitting would fit.

I then mounted the corresponding parts to a piece of board and checked the fit.  I found that the rudder head did not slip smoothly onto the transom fittings, a sign of an alignment problem.

I thought for some time about how to check the alignment of parts.  Just eyeing things up didn't seem to be sufficient.  Since each half of the fitting has a part with a hole (the gudgeon), and one with a rod (the pintle). I hit upon the idea of putting a close-fitting rod through the gudgeon hole and checking the alignment with the pintle.  I went through my scrap supplies and found that I had an old aluminum arrow shaft that was the perfect size.  Putting this through the gudgeons showed up the alignment problem.

Now that I had a way to check my alignment accuracy I could take steps to get things lined up. Starting with the pintle that mounts on the transom, I put it on a surface plate (very flat surface), and used a taper gauge to check the height of the pin at each end.  I found that the pin was parallel to the surface plate and didn't need any work, so that was good.


Putting the arrow shaft through the gudgeon and doing a similar measurement, I found the rod was not parallel to the surface.  So I put the part in the vice and started filing off the high side.


Without too much effort I got the parts to align well.


With these parts aligned, I knew that if I could do a similar alignment on the rudder head half that my problem would be solved. 


Here's the setup for checking the alignment on the rudder head. 


In this case, adjustment was not so easy, as I had to carve away plywood to get things to line up, but eventually I got it pretty close. 


Mounting the transom half to a test board things now slid together pretty well.  

My next step was to figure out where on the transom to put the parts.  I drew a center line for left/right alignment, and then clamped the parts on and adjusted for vertical height.


I needed to make sure the tiller handle had clearance in the transom opening, and wanted to have my rudder uphaul/downhaul lines clear the edge.


Once I finalized the position I marked the heights of the parts, then removed the rudder head.  I again used the arrow to make sure the fittings were aligned, and drilled bolt holes.  I decided to install fiberglass patches on the inside of the transom to toughen up this surface and keep the nuts from digging in.

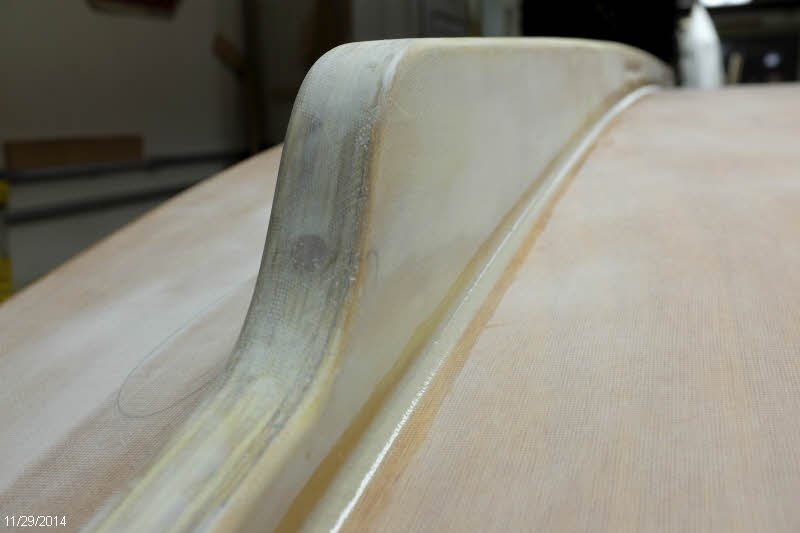
When I drilled the holes, I had a little chip-out, so I filled that (the white in the photo below) before applying the fiberglass patches. 


After the epoxy cured, I used a  scraper to taper down the edges, and then applied some fairing compound to blend them in. 


When that cures a little sanding should have this ready for paint.  It's nice to have these parts ready now to install.

Sunday, February 1, 2015

Upside up again - fairing and finishing

With the centerboard slot gasket installed I completed turning the hull right-side up again.  I grabbed a couple of the stands that were under the building jig and screwed parts of the jig side panels to them to make a stand to raise the hull off the floor, and it sits nicely on the skegs. I expect to put similar cross members on the boat trailer for support there.


I had noticed while installing the centerboard slot gaskets that the uphaul line for the centerboard was not going to line up as I expected with the hole in the front of the centerboard case, being an inch or so too low.  Not sure how I messed that up.

I decided to fix that by routing the line out of the back edge of the board vs. the top.  That position comes around higher when the board is raised.  I bored the new hole.


And filed a rope channel.  On what is the front face of this photo you can see the old hole filled in with epoxy.  This should put the rope close to the right height when the board is raised.


With the hull upright I proceeded to trim and round over the top of the rubrail.  Always satisfying to make curly shavings with the plane.


Here's a view from the bow of the result after routing off the corner and doing some sanding.


And then I worked some more at fairing the deck/cabin joint.  This was necessary because of the fiberglass tape that I applied on the exterior to strengthen that joint.  I iterated a couple times on this and then decided it was good enough.


I also finished up the fillet and fairing of the top of the mast trunk.


And then I could move on to paint.  I had done the cuddy interior and the floor while the boat was upside down, so now I continued with the seats and seat backs on the inside, and the deck, cabin and roof.


I was second guessing my choice of color for the deck and cabin roof until I layed out the sail for a color comparison.  The sail and the roof/deck are in the same color family and should look good together.


Here's what things look like after two coats of paint. 


And here's a view towards the bow.  It's fun to see the finish going on.


I've got at least one more coat of paint to apply, and will need to be a little more careful at the line where the two colors meet to get that looking good.

Next up I'll be laminating the top trim for the seat backs.  That will add about 3/4" more height to the seat backs, and I'll be able to put a generous round over on the edge for back comfort.  I'm planning to have the top 2 inches wide to make a comfortable arm support.  Stay tuned for that.

Sunday, December 14, 2014

Protecting the pointy end

With the skegs installed, I was looking forward to starting the hull paint job.  But as I viewed the bare hull my eye kept returning to the pointy end.  I thought about that one layer of fiberglass cloth and thought about the potential abrasion from all the beaches I expect to pull up on.  I knew I would feel better about the situation if I had a little more protection in place.

So I decided to delay the hull painting and put a couple layers of dynel cloth on the pointy part. Dynel is an abrasion-resistant cloth, and I have applied it to the front edges of the rudder and centerboard also.

Here is the first layer of cloth cut and marked with dots from a black Sharpie pen so I don't slide it too far out of place when applying the epoxy.


Here's the bottom layer wetted out with epoxy.  It takes more than the fiberglass cloth does, and seems to swell up a little as it absorbs the epoxy.


Here's the second layer in place.


I knew I would have to apply fill coats anyway, so I tried something new this time, and applied the first fill coat right over the wet cloth.  Seemed to work OK, and maybe saved me one iteration.


Here's one of the followup fill coats.  You can see the microballoon-thickened epoxy has sagged before it dried.  It's hard to get it thick enough so that doesn't happen.  If you mix it too thick it doesn't spread out smoothly.


Here's what it looks like when almost done.  You can see that I have sanded and filled multiple times, marking the low spots each time with pencilled circles.  

I don't think I'll be able to get this perfect, but I don't want it to look too lumpy.  I put one more coat on this evening and hope that will be the last one.


Sunday, November 30, 2014

Skegs finally finished and installed

With one thing and another, I've been working on finishing these skegs for far longer than I thought it would take.  In the previous post I covered how I shaped the skegs from two layers of 3/4" plywood.  The next step was to sheath them with fiberglass cloth.  

To make best use of the cloth I cut strips off the width of the 50" cloth.  It took two pieces per side, for a total of 8 pieces, which overlap on what will be the bottom edge.  

Because of the finger hold cutouts I didn't feel I could apply one piece from one side around the edge and down the other.  So applying one piece at a time on each side, I had at least four separate sessions to apply all the cloth.

Getting the cloth to conform to the fingerholds took a lot of prodding with the epoxy brush to keep the glass from pulling up and allowing air bubbles underneath.  That went on for an hour or so after laying the cloth until the epoxy started to cure.  


Before applying the glass I had rounded over the edges of the finger holds with sandpaper, except for one that I either forgot to do, or didn't round enough.  I could not get the cloth to stay down, so I put on a layer of release fabric and clamped a dowel of the right size in place.


That worked pretty well, though the dowel was a bit of trouble to break loose.  I could have just put packing tape over the dowel and skipped the release fabric, but I wanted to try out the fabric.

After I got all the fiberglass applied, I had multiple sessions of applying fairing compound, sanding it smooth, and iterating on the low spots.  While I had the fairing mix made, I took the opportunity to do a little more work on the rudder and centerboard, which I had set aside short of completion some time ago.


I'm going to put UHMW plastic on the edges of the skegs, so I ripped about 1/4" off my 1 1/2" wide stock, rounded the ends, and routed the edges.  I'm going to countersink stainless screws into this to hold it on.


To keep water from following the screws and getting under the fiberglass, I drilled oversize holes to fill with epoxy.  I'll then drill pilot holds into the epoxy plugs to drive the screws in there.


Here's a shot of my old Delta drill press, which has a swivel head.  I think this is the only time I've ever swiveled it...


Here I've filled the holes with epoxy thickened with wood flour.


And here's the result after removing the excess. 


To locate the skegs on the boat and ensure they are parallel and equally spaced from center, I taped down a reference line and measured out from that. 


I applied thickened epoxy, and braced the skegs from the ceiling.  Not much pressure was needed.  

I didn't find a specific measurement for how wide to space the skegs, so I guessed at a spacing that looked right to me.  I wanted to leave enough space next to the centerboard slot to allow for the fillet, the tape to adhere the centerboard slot gasket, and room for the gasket to flex.


After the epoxy cured, I ran a fillet around the edges.


Heres' an overall view.  Looking good!


I finished off the fillets by sanding them a bit with a small dowel wrapped in sandpaper.  It didn't take long and they smoothed out very nicely.  These are now some of the nicest fillets no one will ever see...


Now I will give the final sanding to the hull panels, and it will be time to slap on some paint!

Sunday, October 26, 2014

Hull fairing and final epoxy coat

Upon my return from Sail Oklahoma, I continued work on the hull bottom.  In places where the fiberglass overlapped I needed to apply fairing compound and sand it back to make the transition gradual.

At the bow, the cloth on the garboard planks overlaps the bow transom, and the cloth on the tramsom overlaps the other way, and onto planks 2 and 3, which have no cloth.


The seam in the cloth falls across the garboard plank in front of the centerboard slot,


And at the stern transom cloth laps both ways, plus an extra thickness where the seam between the two pieces of cloth on the bottom meet.


The fairing mixture I used was epoxy thickened with micro-balloons (tiny glass spheres that sand easily.  I applied it to all the places shown above and sanded it back.  There were still a couple low spots (more easily detected with the hand than the eye), so I applied more to those areas and sanded again.  

I eventually got to a point where I decided it was good enough', and then applied a final coat of epoxy.  I did that because I felt there were some tiny spots in the weave of the glass cloth that were not fully filled, and on planks 2 and 3 there were a couple areas where I had accidentally sanded down to or close to bare wood.

The real test of how well I did on the fairing will be when the paint is on and the boat is out in the sun catching reflections from everything around.  But the shiny fresh epoxy gives a preview and confirms that it's good enough for me.


Thursday, October 2, 2014

Seat backs installed

Time now to install the seat backs.  I didn't have any clamps that would work for this job (though I am thinking I will make some of the deep-reach cam clamps in the latest WoodenBoat magazine for future jobs like this), so I resorted to using screws.  This worked pretty well,


though it left a bunch of screw holes to fill.


With the seat backs in place I cut and installed the little triangle transition pieces.  The ones included with the kit didn't fit quite right, so I cut my own from scrap.  Masking tape holds the part while the epoxy cures. 


I then rounded the outer edge and filleted the inner curve and appliet a bit of fiberglass cloth.  I like the way the cloth shifts to cover complex shapes like this without the need of cutting any darts or anything.


I saturated that with epoxy.


and put a piece on the inside, too. 


And also took this opportunity to put fiberglass tape along the deck/cabin side joint. 


Here's my first pass with the fairing mixture.  It sagged a little on the vertical surface.


And here's after a bit of sanding.  This still has a ways to go before I'm done.


I then turned my attention to the reinforcing rail on the seat back.  I made this from two thin strips, so I was able to clamp them in place without steam bending.  

I first laminated them  in place on the seat back, but not glued to the seat back.  After the epoxy cured I then took the lamination off and cleaned up the bottom edge, tapered it toward the rear end, and rounded over the bottom corner with the router.  Then I took the result and glued it in place on the seat back.


I cut and fit the return on the front edge,


And trimmed the back to length. 


A little bit of sanding finished it off.


I plan to install a cap on top of this about 1/2" thick.  That will cover the exposed edge of the plywood and allow me to put a nice generous round over on to make it more comfortable to have an arm resting against.  I may also add a wider section if I find that I like to sit up on the rail.  I didn't know where the best place for that would be at this point, so that's a future item.