Showing posts with label tools. Show all posts

Sunday, April 6, 2014

Mini-tool review - Microplane rasp

This weekend I was looking through the remaining pile of boat pieces, and was pleased to find that they grow fewer all the time - a visible sign of progress. 

Among the remaining pieces I spotted one that I had forgotten about - the cleat that supports the aft edge of the foredeck.  I thought I might as well install this, and went to check the fit on the boat.  I found that I had painted over the gluing area, so I first scraped that area clean.  I then found that I had put some nice substantial fillets around the deck beams on the forward side of bulkhead 2, and so the cutout in the cleat would not fit.

I had a couple options at this point.  I could try to remove the fillets, which would be a lot of work.  I could make a new cutout in the part big enough to fit around the fillets, but that would not be very elegant.  I took the third option - to form the cleat to conform to the fillets, and to do that I called into service one of several microplane rasps that I bought a little while ago.

These stainless steel rasps have lots of very sharp tiny cutting edges, and come in fine or coarse in several different profiles.  They work great.  The company's web side is here if you'd like more info: Microplane Rasps 

Here I'm using a coarse, square profile rasp to shape the deck cleat cutout. 


Here's the final result.


And here's the installed part - a perfect fit!


These tools also work great on cured epoxy.

Wednesday, April 2, 2014

More hull panels and a Whoops!

I have continued to install more hull panels, and it's been rewarding to start to get a more complete feel of what this boat will look like.  

After applying a panel I come back about a day later and hit the edges of the fiberglass tape with a scraper to smooth off the rough edge.  The tape has a little structure at the edge that sticks up and is rough, and one edge is worse than the other.  The scraper made quick work of it.


And after vacuuming up the shavings we see this.  I don't intend to attempt to further smooth this out.  It's inside the storage area, and all I care about is that there are no rough edges to snag anything I store in there.  the inside of the hull panel and fiberglass tape will get one more coat of epoxy to ensure all is sealed, and then two coats Rustoleum Gloss White to finish it off.


I found that the front of the garboard panel curved across the center line due to the keel from the bow transom down to the bottom of the hull having a slight curve.  


I used a plane to trim that panel back to the center line so that it would not interfere with the panel on the starboard side.


I then took a look at where the material was removed, and how much was taken, and got out the spokeshave to make the other side look the same


After installing the panel, the front edges meet up nicely. 


Moving on to panel number two, things got a little more difficult.  The bottom hull panel rested against the hull bottom, but panel 2 doesn't have that luxury.  I ended up suspending the panel with some thin nylon straps to get it roughly into position, and then wired it on in a few places.

I then took out some wires and loosened others.


This left the hull panel hanging loose enough so that I could get under there to apply thickened epoxy to the lap joint and then tighten things up again.


So, current status is four hull panels installed, filleted, and taped.


And it's looking like a boat!


But alas, all is not perfect.  I got so into getting hull panels installed that I forgot I needed to use the seats to align the bulkheads.  I've had some issues with this plywood in that the pieces tend to warp and twist somewhat.  Not sure why that is, but the net result in this case is that all the bulkheads no longer line up with the slots in the seats.  Whoops! 

This is the worst one.  Looks like I'll need to open up the slot on one side, and fill it in with epoxy (wood flour fillet mixture) on the other.  Should not be a big deal, and the hull panel shape looks good.


My wife consoled me, saying that no one would ever notice as long as I didn't blab it all over the internet or something :-)


Tuesday, February 11, 2014

Pivot bushings installed

After the oversized, epoxy-filled pivot holes in the rudder and centerboard cured, I drilled them out with a forstner bit to the right size for the bronze bushings, and proceeded to prepare the bushings.  My local hardware store didn't sell bushings long enough for the full width of the parts, so I bought them in pairs.  I used one full length (1 1/8 inches) and shortened the second one to make up the length required.

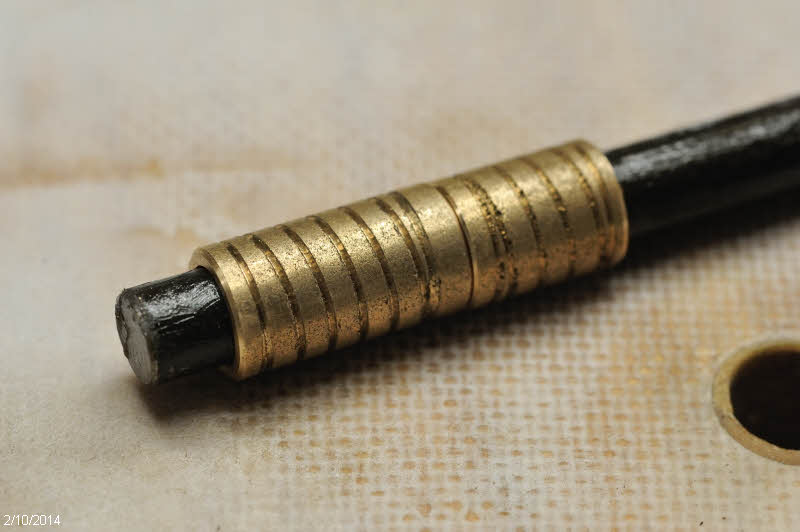
I first cut the bushing to rough length with a hacksaw, then chucked it up in the metal lathe and faced of the end.  I was having fun, so decided to spend the time turning a shoulder on one part and boring a recess in the other for a nicer job.  I then turned some coarse threads on the outside to give the epoxy something to grip.


Can hardly see the joint when these go together.  Nice to have a lathe... 


Here's a shot showing the threading in progress on one of the bushings that goes in the centerboard case.


However, to save time on the rudder pivot I just used a butt joint.  


I put a piece of tape across the bottom of the holes, coated the outsides with unthickened epoxy, and inserted them in the holes.

When I installed the centerboard case bushings, I combined two steps.  Instead of drilling the holes oversized, filling them with epoxy, and then drilling them out again, I instead drilled oversize and then cast the bushings in place.

To hold them in perfect alignment, I used a spacer block that fit exactly inside the case.  I taped both sides, and drilled a 1/2" hole on the drill press.  Here's the spacer block installed in the centerboard case.


I then could put a greased 1/2" rod through the bushing and block to ensure the bushing was perpendicular.


I coated the inside of the hole with unthickened epoxy, then coated both the inside of the hole and the outside of the bushing with thickened epoxy and inserted the bushing.  Then poked around with a toothpick to try to make sure there were no air bubbles in there.  If I were doing this again, I would drill the oversized hole larger to make it easier to get the epoxy in there.  The bushing is 3/4" outside diameter, and the hole is 7/8", so just 1/16" gap.


I filled the top hole, then the next morning turned the part over and did the other side.  After the epoxy cured I removed the rod and was able to drop the pivot bolt in with no binding, so I was pleased with my success in getting these bushings aligned with each other, and perpendicular to the surface.

I liked doing this work on the flat vs. trying to install these after the centerboard case was in the boat.  Other than dealing with large parts it was fairly easy to keep holes perpendicular on the drill press, checking alignment with a small square.

Saturday, February 8, 2014

Centerboard case assembled, spacers created


I have decided to build the centerboard case outside of the boat for several reasons.  Primarily I wanted to be able to put the case on the drill press to ensure the centerboard pivot holes are perpendicular and perfectly in line.  In addition, this also lets me glue on the flat, and I can use clamps vs. drilling screw holes and having to fill those in afterward.  

I took quite a bit of time to ensure all parts were aligned, then made marks so I could replace things in the right place.  I applied unthickened epoxy to the bare wood of the case ends to make sure they were saturated, and then followed that up with thickened epoxy on both the end pieces and the case sides.

Once the glue was applied, everything was very slick, but I aligned marks and then fired in a couple pins from my pin nailer, which kept the pieces from sliding around when I applied the clamps.  That worked well.

Both these plywood pieces had a bit of a twist in them, so you can see I have the far right corner clamped down to the heavy table, and the leftmost corner pushed down with a go-bar against the ceiling to take out the twist.


Gentle clamping pressure was applied to avoid starving the joints, and the inner case corners were smoothed over with a long dowel.  In this photo you can see the end of a couple long spacer sticks lying the long way in the case to keep the sides the right distance part and make sure there is no overall bowing of the part.


I also set up the rudder and centerboard on the drill press and drilled the pivot holes out oversized.


And filled them with thickened epoxy.  After that's dry, I'll drill the holes out to accept bronze bushings.


To keep the installed centerboard in the middle of the case, I visited the local hardware store looking for some large nylon washers, but didn't find anything appropriate.  So I looked around the shop and found this chunk of plastic I picked up at a salvage yard some years ago.  I've already used a corner of this for something, can't remember what.  I traced a circle and cut it out with the bandsaw, then did my best to resaw it the thin way to yield two blanks.


As you can see below, that didn't go too well, as I had trouble with the blade wandering.  But I have plenty of thickness to work with and one flat face to start with.  I attached piece of plywood to the faceplate of the lathe, and used double stick tape to attach the plastic to that.


I faced off the plastic until it was smooth and about the right thickness (just over 1/8th inch), and trimmed the outside edge to make it round.


Then drilled the center hole.


Here's the plastic stock, rough blank, and finished part.


And here's a picture showing the overall size of the spacers on the centerboard.  They are about 3 inches across, which seems a good size to me.


Tuesday, December 3, 2013

Bulkhead access holes... continued

Tonight I finished cutting out the access holes and cleaned them up.  I sanded to the lines in the corners using a drum sander on the drillpress:


And then a spokeshave made quick work of bringing the straight edges down to the mark:


Following that, I sanded the sharp edges into a nice radius, so these pieces are ready to be epoxy coated.

Monday, December 2, 2013

Bulkhead access holes

I had a few minutes this evening to work on the boat, and so started cutting out the larger access holes in bulkheads 5 and 6 per the latest plans addendum.


I fired up the old Dietz kerosene lantern for mood lighting, and was once again reminded of how much heat a lantern like this puts off.  I think it could take the chill off nicely on an overnight trip with some type of snug tent rigged over the cockpit.


Friday, November 29, 2013

Trimming weight

I spent much of the day today trimming down the centerboard and rudder weights.  The top surface is not smooth as poured and if there is extra lead the halves don't fit together well.


The lead is soft and can be worked with woodworking tools like scraper, bench plane, etc., but that's a lot more work than I thought it would be.


I resorted to my old Atlas shaper to do the job.


I had to reposition the weights to get the parts that were under the clamps.  And the centerboard weights exceeded the capacity of the machine, so had to move them around a couple times.


Here's a shot of the underside of a centerboard weight as poured.  I ended up filling in some of the larger voids with fresh lead.


This whole process took a lot longer than I had hoped, and it will be good to have it all glued together.