Showing posts with label lamination. Show all posts

Saturday, February 7, 2015

Seat back tops laminated and installed

Before doing any more painting I next wanted to create and install the tops on the seat backs. This is the last structural part of the boat to be built, so getting this done is a great milestone.

I've been thinking over time how I wanted to handle this part.  Some builders don't have any trim installed in this area, and some builders have fairly wide tops installed, the better to sit on. Because I don't yet know whether I'll want to perch up there much, and don't know where the favored location will be if I do, I decided to just install a medium wide top, as I can always modify that later if I want to.

I decided on a top that is about 3/4" thick and 2" wide.  I laminated this up from four 1/2" strips of pine, which take the bend fairly easily.


I put clear packing tape on the tops of the seats, so that I could laminate the tops in place. It was another glue-up that took most of my clamps.  I used C-clamps to clamp sticks to the seatback on the inner part of the curve, then pulled in the ends with the handscrew clamps.  I used lightweight bar clamps down to the bottom of the seat back to pull the top down to the curve, some small bar clamps with sticks to align the top of the lamination, and some small bar clamps and c-clamps to hold the laminations together.  Quite a conglomeration.


After the epoxy cured I had two tops that were curved just right to fit the seat backs.


I knocked off most of the squeeze out with a scraper, and then a quick trip through the planer had them looking nice.


The next step was to determine the edge profile.  I cut off a bit of the extra length and layed out three different radii on the edges.  My largest roundover bit is 1/2" radius, so I used that on the inner top.  I didn't want the outer edge to be completely rounded over, so used a smaller bit on the bottom edge of that.


The only tricky part to fit was the return at the front of the cockpit.  This has a compound bevel where it meets the cabin side, and it's easy to get too short as you sneak up on the right fit. 


But I got this side just about perfect.  As for the one on the other side, well, that's what thickened epoxy is for...


I primed the bare wood with unthickened epoxy, and then used silica-thickened epoxy to glue down the parts. After the epoxy cured and the clamps were cleared away I was pleased with the way things were looking.


And a little sanding dresses it up even further.


When I clamped these for gluing, I tried to let them hang over to the inside just a bit, so that I could bring them back flush with spokeshave, sandpaper and scraper.  This shot is from before I did that.


After bringing the insides flush and cleaning up a bit of squeeze out on the underside I sanded them all over and then finished up with a fillet of epoxy.  Here at the cabin junction:


And all along underneath the edge.


I climbed in the boat and tried them out and found this bit of wood provides a really nice arm rest with no sharp edges, and sitting up on top for a bit to stretch my legs if wanted should be very doable, too.  All in all a nice looking and functional addition to the seat backs that finishes things off nicely.

Saturday, June 28, 2014

Rudder head construction

Here's the construction sequence for the rudder head.  I had a couple goals I was trying to meet.  I wanted to line the uphaul/downhaul line channels with copper pipe to reduce friction, and wanted to laminate the center section first to make it easy to clean up and finish areas that will be hard to get at later when fully assembled

I fussed around with the layout for the line channels for a while before deciding on the route shown below.  I wanted the openings to exit the front of the rudder head as near the tiller as possible, and I wanted the rear exit to be gentle, so the line would not need to take a right-angle turn there.  Using the flexible copper pipe, here's what I decided on.


Heres' the exit on the front of the rudder head


And here's the back side.  Because of the thickness of my rudder, I added one layer of 4mm ply in the center of the lamination.


 Here's the glue-up of just the center layers of the rudder head


After the epoxy cured it was time to clean up the edges and trim the tubes to length.


A small hacksaw made quick work of the protruding tubes


And a bit of sanding smooths them down nicely.  I will further round the edges before running the uphaul/downhaul lines over them.


I used epoxy/graphite mixture to match what I did on the cheek pieces


And then laminated the complete assembly.


Saturday, May 10, 2014

Cockpit sole laminated

Well, here's a job I had been putting off for a while.  The cockpit sole (floor) is made up of two layers of 9mm plwood that need to be laminated together. Getting these property aligned and sufficiently clamped was something I had been worried about.

The builder's manual suggests doing this in the boat, first gluing down the bottom layer, then screwing the top layer to the bottom layer and venting the epoxy out through a whole array of 1/4" holes drilled for the purpose.  My objections to that method are 1) it's hard to work inside the boat, 2) it would be a pain to fill all those screw and vent holes, 3) it would be more difficult to fillet around the edges.

I decided to laminate the two layers on the bench.  And since I have a number of hatches in the floor, I felt I could get good clamps in the center areas of the floor.  I made sure I had a good coating of epoxy in the areas around the hatch openings and in the areas where I have drainage channels from the hatches to the gutters along the edge of the floor.


Next I took two 2x4s and jointed one edge straight.  I then ran them through the planer to straighten the opposite side and ensure they were the same thickness.  I set these up on a table and shimmed them until they were parallel.  This allowed me to elevate the parts above the table and have room for clamps.

Then I spread thickened epoxy with a grooved trowel.


And proceeded to use almost every clamp I own in the glue-up!  


After the epoxy cured I ran a fillet along the edge of the gutter. 


I even remembered to keep my drainage channels clear of epoxy both in the glue up and the filleting!


I'm glad to have that job done.

Hatch stiffeners and backing plates installed

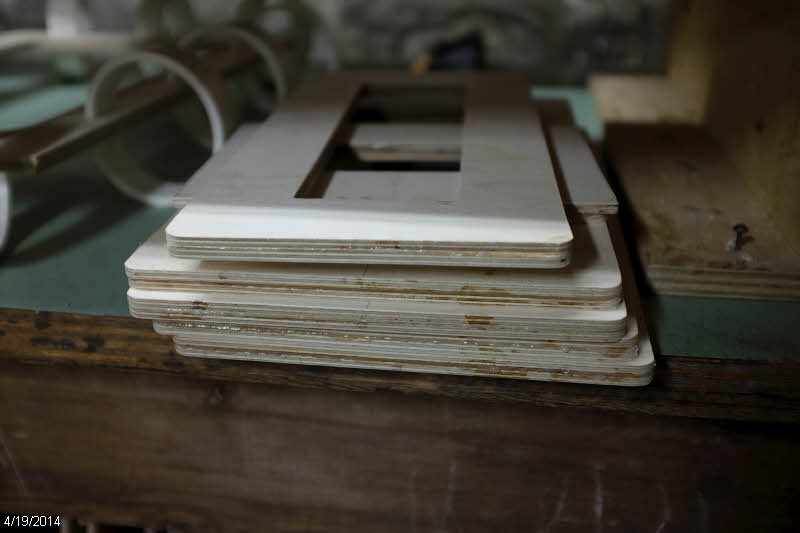
I'm finally nearing the end of the hatch construction.  I finished laminating the backing plates,


leaving me with a stack that all needed to be cleaned up of squeeze out, corners rounded and edges routed.


Then I could epoxy them to the hatch covers.  Again I used the trick I've mentioned before, of inducing a little twist in the opposite direction of the twist in present in the hatch lid.  After the epoxy cures and the clamps are removed I end up with near perfect flatness in the lid, which is important for the seal against the gasket.


Then it's time to coat the bare wood with epoxy, sand, and coat again.


Here I'm installing the backing plates for the round hatches in B4 and the aft seat tops.


Thursday, April 24, 2014

Hatches and Secret Passageways

Starting with the stack of hatch opening reinforcements and hatch stiffeners from my last post, I have laminated, cleaned up glue squeeze-out, trimmed, rounded corners and edges, and sanded until I've had about enough of that for a while!  But now they are all ready to go.

Here's a pile of laminated hatch stiffeners on the left and the port seat hatch reinforcement on the right.


Here are the cockpit sole hatch opening reinforcements ready to install.


And here they are clamped up waiting for epoxy to cure.  I made these PVC pipe clamps about 15 years ago when I built my first kayak.  The idea is from Chesapeake Light Craft, and they are made from 4" schedule 40 PVC, cut about 1 1/4" wide, and then cut so they can spread open.  They work well, and are cheap to make.  I find they are best clamping about 1" thickness, they are a bit less effective on this thinner glue-up, so I used a bunch of them.


First coat of sealing epoxy is on those now.  I'll sand the fuzz off and put a couple more coats on before this gets installed.  Same progress with the hatches in both seat tops.


I've also started gluing on the hatch stiffeners to the back side of the hatch lids.  As with the hatches I did for B3, there is some twist in the plywood, so I twist it a bit the other way (see the 4 mm spacer at lower right) and glue it up.  I try to guess right with the spacer so that when unclamped it springs back until it's flat.


As I was doing all this hatch work I was thinking about drainage.  I was thinking that the cracks around the hatches in the cockpit sole are likely to get filled with water in the normal course of events from wet swimsuits climbing in, rain, overflow from filling the ballast tank, etc., and that water would fill the cracks and stay there until it drains into the storage areas if the hatch gets opened.  It seemed to me that could be irritating.

I have seen others rout a channel the full depth of the sole doubler (the top layer) to allow that water to drain away.  But I didn't like the look of that.  After a bit I came up with my idea of "Secret Passageway" drainage!  

I routed a drainage channel on the underside of the sole doubler leading from one corner of the hatch opening to the gutter that runs down to the sump in the rear of the boat.  I cut the channel about half the thickness of the plywood, and angled it back at a 55 degree angle.  The sole has a slight tilt towards the rear so water should drain through here by gravity.


The openings are pretty much invisible, and the cockpit floor is undisturbed.


If these would ever get plugged with gunk it should be pretty easy to poke something through there from the hatch opening side to clean them out.


These channels will be well coated with several coats of epoxy to prevent water from seeping into the plywood, and I'm making a special tool (ok, basically a rounded stick) to run through the channels as I glue the two pieces together, to clean out any thickened epoxy that squeezes into the channel and would block it. 

I think this is going to work nicely.  Any other SCAMP builders that want to borrow the idea please feel free!

===============================
July 27, 2014 addendum - I had a question in the comments about the router and templates I'm using for some of the build sequence, so heres' a shot of the Porter-Cable router.  I've had this for probably 20 years - I don't know if they still make this model (#693 with a #6931 plunge base)


Here's a photo of the bottom with a template guide bushing installed, and some of the other spacers that I've used on this project: 


And here's a shot from above showing the knurled ring that fixes the template guide in place.


Sunday, January 12, 2014

Rudder and centerboard lamination

I decided it was time to get the rudder and centerboard pieces assembled, so I spread glue on the mating faces, using a notched spreader to distribute the epoxy across the surface.


 Then applied clamps until I had squeeze out all along the seam.


Here's a shot of the centerboard clamping.  It takes a lot of clamps!  At the far end of the table you can catch a glimpse of my 23 gauge pin nailer.  After I slid the halves around until they were in alignment I shot a few 1" stainless pins in to keep the parts from sliding around while clamping pressure was applied.  That worked well.


I've also glued up the puzzle joint in the cockpit sole, and have been busy epoxy coating all the major parts of the boat that would need it sooner or later.  Sole, sole doubler, deck parts, transom cap.  I'm running out of parts, so that's good.  It will be nice to have them all ready to go at assembly time.