Saturday, January 17, 2015

Installing the centerboard slot gasket

With the skid strips installed I had one more job on the bottom of the hull to complete, and that was installation of the centerboard gasket.

The purpose of this gasket is to reduce turbulence at the centerboard/hull interface and the open part of the centerboard slot.  It also helps to keep sand and pebbles out of the slot when sitting on the beach.  Pebbles in the slot can jam the board in the up position.

There are a number of ways to attach a gasket, and I chose to use adhesive tape.  I also chose to install the gasket on the hull bottom without routing any kind of recess.  Here's the tape that I ordered.


I ordered 3" wide gasket material from Anapolis Performance Sailing.  This gasket material is a plastic somewhat thinner than a credit card, smooth on one side and with a thin dacron material bonded to the other side.

I believe the dacron material is so that you can epoxy on the gasket, but I thought it would be potentially difficult to get epoxy only where I wanted it, so I decided to go with the tape.  I assumed I would need to scuff up the shiny side and apply that side to the tape, leaving the cloth covered side down.  

Ideally I would want the shiny side out, so I did a test, taping two test sections to the rear of the skeg.  To my surprise, the cloth side seemed to adhere very well to the tape, so I decided to tape to that side and leave the shiny side out.


I first masked off the area where I would apply the tape so that I could scuff up the paint just in that area.  I planned to keep the tape away from the edge of the slot so that the gasket has room to flex.


I then cleaned up the dust, wiped the area down with acetone, and after that evaporated I put the tape on the hull, pressing firmly.  Here on the forward end I cut the corner a bit to keep away from the corner of the hull.


Next I cut the gasket material to size.  I had to trim the width a bit.  I lined up one side of the gasket with the centerline of the slot, and overlapped the other by about 1/4".  My idea in having this a bit asymetrical is that it reduces the likelihood of the material 'tenting' and failing to lie flat with the board retracted.

Since there is tape on the front of the slot I marked and cut the gasket to allow the edges to flex open.


At the rear of the slot I marked and cut a V-shaped opening to allow water to drain out.


Then I removed the protective plastic from the tape and pressed the gasket into place. 


So things then looked like this. 


Lifting up the hull and turning it on its side, I installed the centerboard to see how things looked. 


I could see that I would need to do something at the front of the slot.  It seemed clear that this was a recipe to scoop up a bunch of water. 


First I viewed the gasket from above and sketched out a curve.


Which looked like this on the flat.


I cut the marked area away, and then after roughing up the gasket I adhered another bit of gasket with another piece of tape.  I then extended the board again and trimmed the edges so it looked like this.


And with the board retracted things close up very nicely.


I'm hoping this installation method holds up long term, but if it doesn't I can always try something else the next time.

Skid strips installed

With the hull painted, my next step was to install the skid strips on the bottoms of the skegs.  I ordered UHMW (ultra-high molecular weight) plastic from US Plastic Corp.  I got two 1 1/2" wide10-foot lengths cut at the 7 foot mark for shipping.  I ripped them in the table saw to 1 1/4" wide, cut them to final length, rounded the ends, and routed a roundover on the edges.

I then drilled and countersunk screw holes in the plastic to match up with the prepared spacing on the skegs.  I drilled into the skegs in the places where I had previously overdrilled and filled with thickened epoxy.  I first put a tape flag on my drill bit so I would not go too deep and drilled pilot holes for the screws.


I then countersunk the skeg a bit, because I found when driving the screws in  I would auger up a little epoxy and then the skid strip wouldn't lie flat on the skeg.  On the second skeg I used a bit bigger drill and things went better.  You need to use a larger pilot drill than you would if driving the screw into wood.

The Weldon countersink shown here works great for any kind of counter sinking -- much superior to the other style that is star-shaped on the end and always tend to chatter.


 Here's the little countersink in the skeg.


Before screwing down the skid strip I prebent the most severe curve, holding it in place with a couple small clamps.


Screwing the strip on then went smoothly.


I continued to drive in all the screws. 


Here's a closer shot of the front end.


And an overall view.  I think it looks nice.


Friday, December 19, 2014

Starting to paint!

There's something about applying fresh paint that is very satisfying.  I've been doing my best to work clean, avoiding any epoxy drips and being careful to sand evenly, and now it's nice to see all that attention to detail pay off with a nice paint job.

With the hull upside down it's easy to paint the underside of the cabin top and other areas.  Here's a shot of the painting I've been doing under there at the same time I've been working on skegs and other things.  This is Rustoleum 'Canvas White'.  Against the gloss white in the interior spaces it looks fairly yellowish to me.  But it's lit by fluorescent lighting, so not sure what it will look like in daylight.  I'm going with it for now, and can always repaint later if I want to.


I have the boat sitting on blocks under the mast trunk, and on one sawhorse about in mid-seating area.  There's plenty of room to work underneath with that arrangement.

But here's what I'm excited about - paint on the hull exterior!  I started with a brush to do the skegs with their finger grips and fillets.


And then a foam roller for the remaining areas.  This is again Rustoleum paint from Menards.  It seems to go on well and look good.


Here I have two coats on the bottom and garboard planks, and one coat on the other two hull planks.  It's looking pretty good!  I'm holding off on the transom until I have the rudder hardware mounted, and a boarding ladder constructed.


Here's a shot of the pointy end, where I spent so much time fairing in the two layers of dynel cloth that I applied for abrasion resistance.  It's not perfect, but I would say there is no lumpiness, and that was my goal.
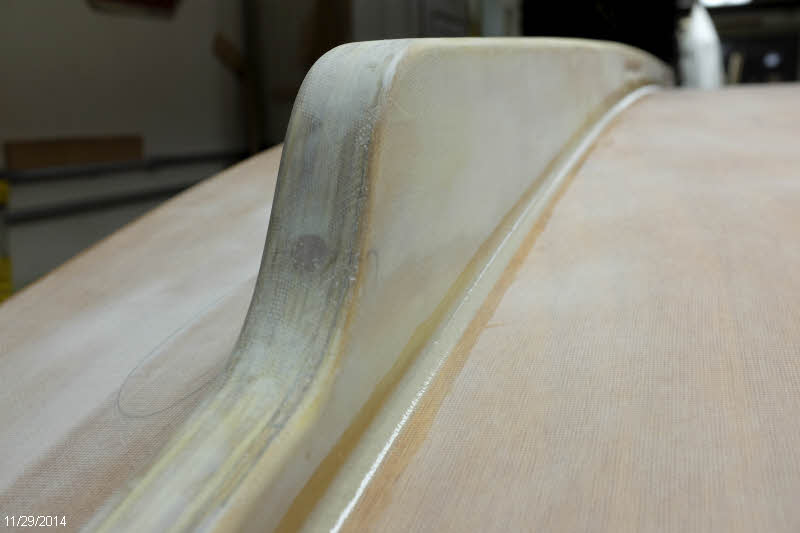

I applied this paint directly over the 80-grit sanded epoxy with no primer.  After the first coat, I could see the scratch marks left from the sander.  After the second coat, less so.  

I'm not really going for an absolutely glass-smooth high-gloss auto finish here.  I'm looking for something that looks good from a bit of distance and is easy to repair and maintain.  I'm thinking this level of finish is just about what I'm looking for.

Laminating a tiller

One of the things I've been working on between other jobs is creating a tiller.  Rather than reinvent the wheel, I decided to use an existing pattern created by Dale Simonson.  You can see the details of the layout here: Dale Simonson's tiller pattern

I drew out the pattern on a piece of scrap plywood, and glued down blocks that I could clamp to. Then it was just a matter of cutting the strips and planing them down to about 5/16" thickness. The thickest part of this lamination took just over 6 strips, and not all of the strips needed to be full length, since the profile of the tiller is not constant.  I used walnut and a contrasting strip of maple the second one down from the top.

Before gluing I put packing tape down on the form so the glue wouldn't stick. Glueup was then straightforward, using regular wood glue.  The curves are gentle and easy to achieve.


After the glue dried, I cleaned up  the squeeze out and then planed it down to a thickness that matches the opening in the rudder head.


I then glued up a smaller blank for the hiking stick.  I put packing tape on the tiller and laminated the hiking stick right on top, so that the curves match.


Then it was a matter of removing any wood that didn't look like a tiller.  The profile changes from square at the end that inserts into the rudder head, to roughly round at the hand end.

I used my Shinto rasp, a spokeshave, and sandpaper to shape this part.  I think it feels best when there is a little increase in diameter towards the end, like a pitchfork handle.  In this photo from above you can see that curve a bit.


I also like a bit of a knob at the end so your hand can tell where the end is.  Axe handles are like this.  I ended up glueing on another thickness of wood at the end so I had enough to shape.


I also found I didn't like the feel of the handle when it was completely rounded, so I put a little flat on the bottom side.  This also helps your hand know where it is on the tiller shaft.


I also rounded off the hiking stick and reduced the diameter on the end to fit into the Ronstan universal joint that holds these two parts together.  Here's how that looks.


To finish this off I need to drill out the hole at the rudder end and epoxy in a bushing, then epoxy coat overall and varnish.

Sunday, December 14, 2014

Protecting the pointy end

With the skegs installed, I was looking forward to starting the hull paint job.  But as I viewed the bare hull my eye kept returning to the pointy end.  I thought about that one layer of fiberglass cloth and thought about the potential abrasion from all the beaches I expect to pull up on.  I knew I would feel better about the situation if I had a little more protection in place.

So I decided to delay the hull painting and put a couple layers of dynel cloth on the pointy part. Dynel is an abrasion-resistant cloth, and I have applied it to the front edges of the rudder and centerboard also.

Here is the first layer of cloth cut and marked with dots from a black Sharpie pen so I don't slide it too far out of place when applying the epoxy.


Here's the bottom layer wetted out with epoxy.  It takes more than the fiberglass cloth does, and seems to swell up a little as it absorbs the epoxy.


Here's the second layer in place.


I knew I would have to apply fill coats anyway, so I tried something new this time, and applied the first fill coat right over the wet cloth.  Seemed to work OK, and maybe saved me one iteration.


Here's one of the followup fill coats.  You can see the microballoon-thickened epoxy has sagged before it dried.  It's hard to get it thick enough so that doesn't happen.  If you mix it too thick it doesn't spread out smoothly.


Here's what it looks like when almost done.  You can see that I have sanded and filled multiple times, marking the low spots each time with pencilled circles.  

I don't think I'll be able to get this perfect, but I don't want it to look too lumpy.  I put one more coat on this evening and hope that will be the last one.


Sunday, November 30, 2014

Skegs finally finished and installed

With one thing and another, I've been working on finishing these skegs for far longer than I thought it would take.  In the previous post I covered how I shaped the skegs from two layers of 3/4" plywood.  The next step was to sheath them with fiberglass cloth.  

To make best use of the cloth I cut strips off the width of the 50" cloth.  It took two pieces per side, for a total of 8 pieces, which overlap on what will be the bottom edge.  

Because of the finger hold cutouts I didn't feel I could apply one piece from one side around the edge and down the other.  So applying one piece at a time on each side, I had at least four separate sessions to apply all the cloth.

Getting the cloth to conform to the fingerholds took a lot of prodding with the epoxy brush to keep the glass from pulling up and allowing air bubbles underneath.  That went on for an hour or so after laying the cloth until the epoxy started to cure.  


Before applying the glass I had rounded over the edges of the finger holds with sandpaper, except for one that I either forgot to do, or didn't round enough.  I could not get the cloth to stay down, so I put on a layer of release fabric and clamped a dowel of the right size in place.


That worked pretty well, though the dowel was a bit of trouble to break loose.  I could have just put packing tape over the dowel and skipped the release fabric, but I wanted to try out the fabric.

After I got all the fiberglass applied, I had multiple sessions of applying fairing compound, sanding it smooth, and iterating on the low spots.  While I had the fairing mix made, I took the opportunity to do a little more work on the rudder and centerboard, which I had set aside short of completion some time ago.


I'm going to put UHMW plastic on the edges of the skegs, so I ripped about 1/4" off my 1 1/2" wide stock, rounded the ends, and routed the edges.  I'm going to countersink stainless screws into this to hold it on.


To keep water from following the screws and getting under the fiberglass, I drilled oversize holes to fill with epoxy.  I'll then drill pilot holds into the epoxy plugs to drive the screws in there.


Here's a shot of my old Delta drill press, which has a swivel head.  I think this is the only time I've ever swiveled it...


Here I've filled the holes with epoxy thickened with wood flour.


And here's the result after removing the excess. 


To locate the skegs on the boat and ensure they are parallel and equally spaced from center, I taped down a reference line and measured out from that. 


I applied thickened epoxy, and braced the skegs from the ceiling.  Not much pressure was needed.  

I didn't find a specific measurement for how wide to space the skegs, so I guessed at a spacing that looked right to me.  I wanted to leave enough space next to the centerboard slot to allow for the fillet, the tape to adhere the centerboard slot gasket, and room for the gasket to flex.


After the epoxy cured, I ran a fillet around the edges.


Heres' an overall view.  Looking good!


I finished off the fillets by sanding them a bit with a small dowel wrapped in sandpaper.  It didn't take long and they smoothed out very nicely.  These are now some of the nicest fillets no one will ever see...


Now I will give the final sanding to the hull panels, and it will be time to slap on some paint!